Supplies:
- Yarn: Size 5 bulky yarn (or substitute a chunky size 6 yarn for an extra-cozy scarf) in your preferred color. You’ll need approximately:
- 200–250 yards for the scarf body.
- 50 yards for the tassels.
- Hook: 8 mm (L) crochet hook.
- Tools:
- Yarn needle for weaving in ends.
- Scissors.
- A 6-inch piece of cardboard or book for making tassels.
Skill Level:
Beginner-friendly, with detailed instructions for creating clean rows and adding decorative tassels.
Abbreviations (US Terms):
- ch: Chain
- sc: Single Crochet
- dc: Double Crochet
- BLO: Back Loop Only
- sl st: Slip Stitch
- st(s): Stitch(es)
Notes:
- The scarf is worked flat in rows.
- The width is adjustable by altering the foundation chain (an even number for this pattern).
- The length is customizable based on preference (approx. 60 inches for a standard scarf).
- Finished dimensions (without tassels): 6 inches wide by 60 inches long.
Pattern Instructions
Foundation Row:
- Ch 22 (for a 6-inch-wide scarf).
- Tip for Beginners: Hold your chain loosely to prevent tight edges, making it easier to work into them.
Row 1 (Base Row):
- Dc in the 3rd ch from the hook (the skipped chains count as the first dc).
- Dc in each ch across. (20 dc total, including the skipped chains at the start.)
- Turn your work.
Row 2 (Textured Row):
- Ch 1 (does not count as a stitch).
- Sc into the BLO of the first st and each st across. (20 sc total.)
- Turn your work.
- Tip: Working into the BLO adds a subtle ribbed texture to your scarf.
Row 3:
- Ch 2 (counts as the first dc).
- Dc into the next st and each st across. (20 dc total.)
- Turn your work.
Repeat Rows 2 and 3:
- Alternate between the Textured Row (sc in BLO) and the dc row.
- Continue repeating until the scarf reaches your desired length (approximately 60 inches for a standard length).
- Tip for a Colorful Scarf: Switch yarn colors every few rows to create bold stripes or a gradient effect.
Finishing the Scarf Body:
- Once your scarf has reached the desired length, finish on a dc row.
- Fasten off and weave in all loose ends using a yarn needle.
- Blocking Tip: If your scarf edges curl, gently steam block it to lay flat.
Tassel Instructions (Optional):
Making the Tassels:
- Cut a 6-inch piece of cardboard or find a book with a similar width.
- Wrap the yarn around the cardboard 12 times (for thicker tassels, wrap more).
- Cut the yarn at one end of the wraps to create a bundle of strands.
- Fold the bundle in half, then use a separate piece of yarn (about 8 inches long) to tie the top securely, forming a loop.
- Trim the tassel ends for an even finish.
Attaching the Tassels:
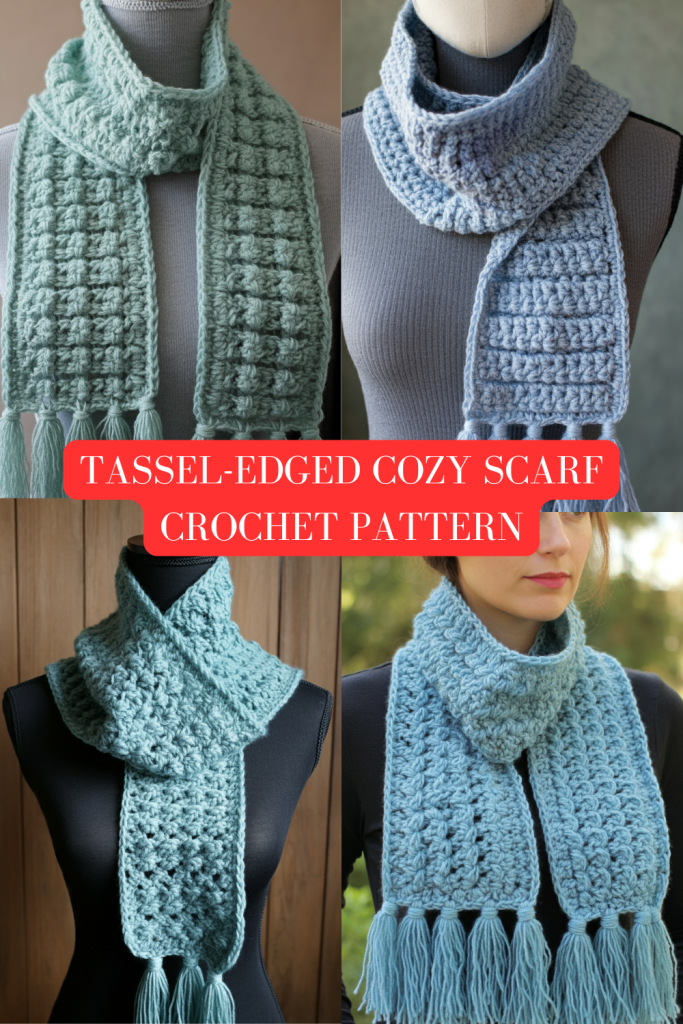
- Place 5 tassels evenly across each short edge of the scarf (10 tassels total).
- Attach tassels by threading the folded loop through the edge stitches, pulling the tassel ends through the loop, and tightening.
- Adjust the spacing as needed for a balanced appearance.
Final Touches:
- Add extra stuffing to the tassels to make them fuller if desired.
- Block the scarf once more if the tassels pull on the edges.
Customization Ideas:
- Color Changes: Add stripes, color blocks, or ombre effects by switching yarn colors.
- Edging: Add a scalloped border or picot edging for a more decorative look.
This pattern will create a warm, textured scarf with stylish tassels, perfect for gifting or personal use. Let me know if you’d like additional features or embellishments added! 😊


