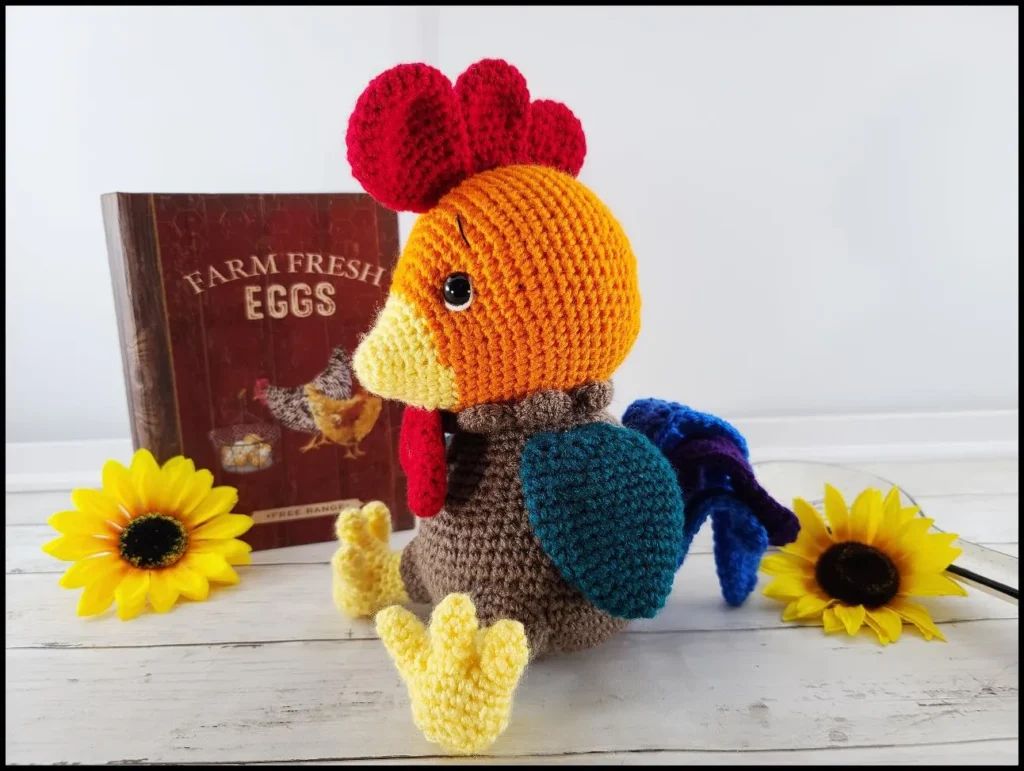
Rooster Crochet Pattern Details
Size:
The finished height from the base of the foot to the top of the head is 13 inches, using weight 4 yarn and a 3.25 mm crochet hook.
Skill Level Needed:
Intermediate – appropriate for beginner crocheters, demands patience and careful attention during assembly.
the rooster and basic crochet skills.
Materials Needed:
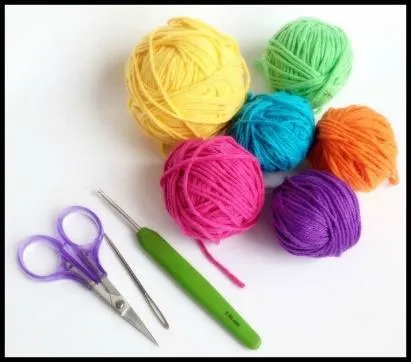
Yarn: Use Worsted Weight #4, about 50g of the main color and 25-50g of accent colors.
Color A: Yellow, Color B: Orange
Color C: Brown, Color D: Teal,
Color E: Blue, Color F: Purple, Color G: Red
Hook Size: D Hook or 3.25 mm
15 mm safety eyes
Scissors, sewing needle, stitch marker, fiberfill stuffing
Use one strand of black embroidery thread and one strand of white yarn.
Abbreviations:
MR (Magic Ring): Create a magic ring and work single crochet stitches into it.
adjustable loop BLO= back loops only
ch= chain stitch F/O= Fasten off
sc = Single Crochet Stitch
inc3 = Make 3 single crochet stitches in the same stitch.
sl= slip stitch hdc= half double crochet
dc= double crochet stitch
inc = Increase: Work two single crochet stitches into the same stitch.
dec = Decrease: Combine two stitches into one using the crochet decrease method.
(4 sc, inc) x 6: Repeat the sequence within the parentheses six times.
Notes:
- Continue working in rounds without joining unless specified, using a continuous spiral technique.
- Insert a stitch marker at the beginning of each round to maintain accurate count.
- Unless the pattern directs otherwise, make all stitches through both loops.
Rooster Crochet Head:
Crocheted from front of head to back
Starting with Color A:
1. Make 6 single crochet stitches into a magic circle. Total stitches: 6
2. Increase in each st around= 12
3-4. sc in each st around
5. (sc, inc) x 6= 18
6. sc in each st around
7. (2 sc, inc) x 6= 24
8. sc in each st around
Change to Color B:
9. (sc, inc) x 6, 12 sc= 30
10.(2 sc, inc) x 6, 12 sc=36
11-12. sc in each st around
13.(3 sc, inc)x6, 12 sc=42
14.(4 sc, inc)x6, 12 sc=48
15. sc in each st around
16.(5 sc, inc)x6, 12 sc=54
17-23. sc in each st around
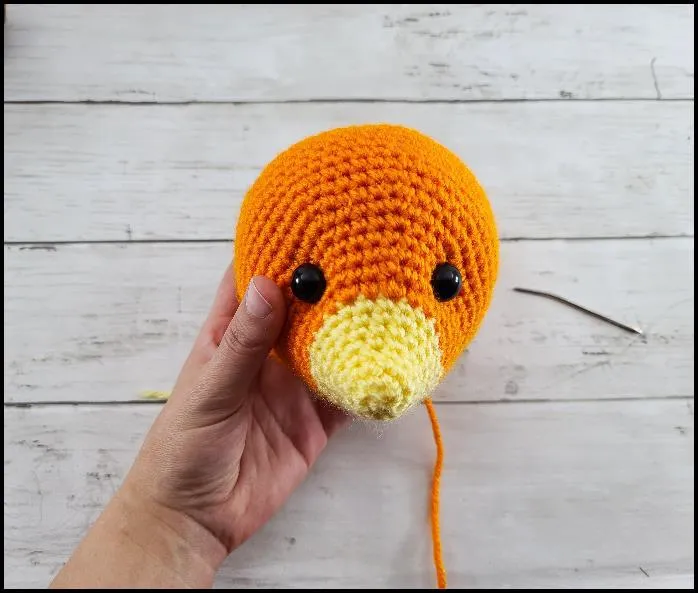
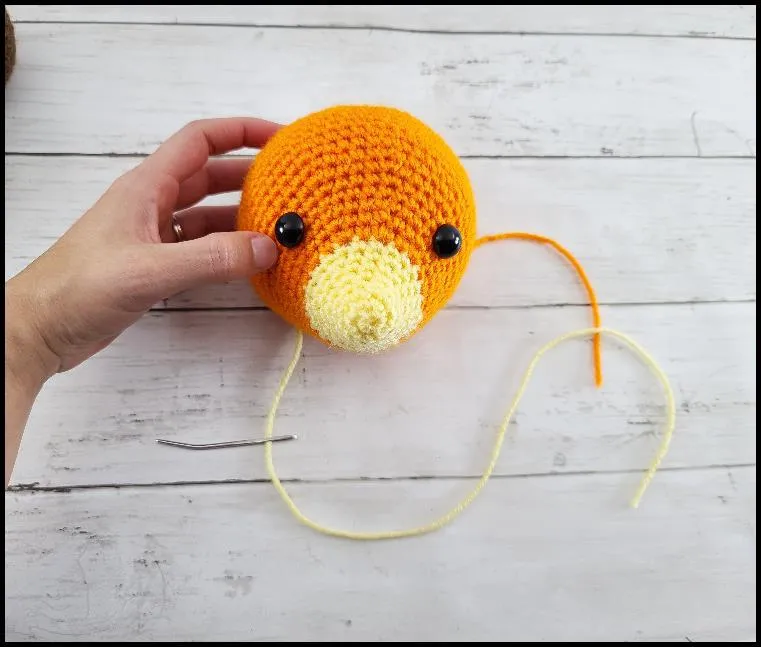
Position the eyes between rounds 12 and 13, ensuring there are 11 stitches separating them. Position the first eye just before the second increase. After installing the first eye, count 11 spaces and insert the second eye in the next available spot. For a sunken eye effect, wait to attach the backs of the eyes until you reach row 27.
!TIP! Adjust the placement of the eyes as necessary based on the yarn and hook size you are using.
24.(5 sc, dec) x6, 12 sc=48
25. sc in each st around
26.(4 sc, dec)x6, 12 sc= 42
27.(3 sc, dec) x6, 12 sc=36
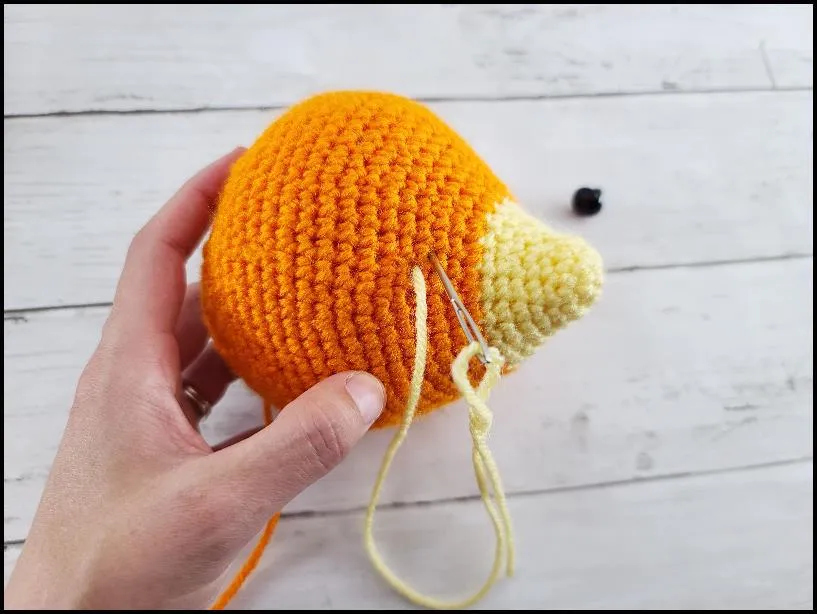
Now for the eyes. Stuff the head well. Cut a long strand of yarn and carefully remove the eyes. Insert the needle into the hole where the first eye is located and pass the needle through to an adjacent hole near the eye.Alternate back and forth between each eye hole, repeating the installation process used for the first eye. After threading the yarn through each hole, give it a gentle tug to tighten. Repeat this process approximately three times on each side or until you achieve the desired appearance. Follow the pictures for help. Additionally, there is a YouTube video available that provides extra guidance on this process.
To attach the backs of the eyes, you’ll need to remove most of the stuffing first.
Attach the washers to the eyes and then restuff the item.
28.(2 sc, dec) x6, 12 sc=30
29. (3 sc, dec) x 6= 24
30. (2 sc, dec) x 6= 18
31. (sc, dec) x 6= 12
32. dec x 6= 6
F/O and sew the hole closed



Rooster Crochet Body
With Color C:
Make 6 single crochet stitches into a magic circle.. Total stitches: 6.
2. Increase in each st around= 12
3. (sc, inc) x 6= 18
4. (2 sc, inc) x 6= 24
5. (3 sc, inc) x 6= 30
6. (4 sc, inc) x 6= 36
7. (5 sc, inc) x 6= 42
8. (6 sc, inc) x 6= 48
9. (7 sc, inc) x 6= 54
10. (8 sc, inc) x 6= 60
11-14. sc in each st around
15. (8 sc, dec) x 6= 54
16. sc in each st around
17. (7 sc, dec) x 6= 48
18. sc in each st around
19. (6 sc, dec) x 6= 42
20. sc in each st around
21. (5 sc, dec) x 6= 36
22. sc in each st around
Start stuffing the body
23. (4 sc, dec) x 6= 30
24-26. sc in each st around
27. (3 sc, dec) x 6= 24
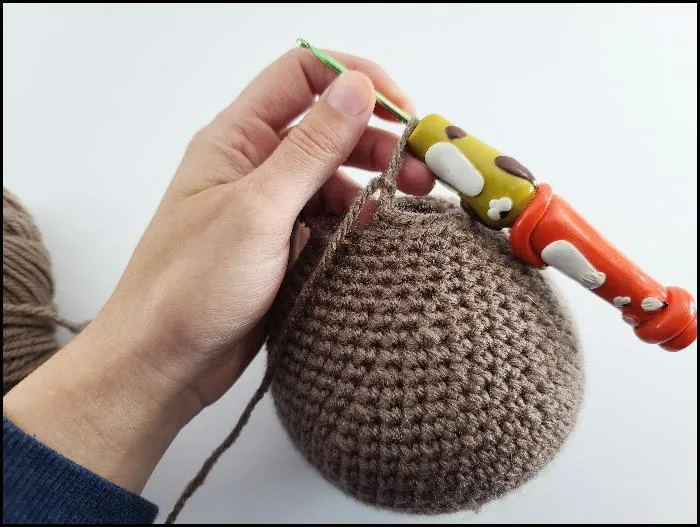
28. BLO sc in each st around
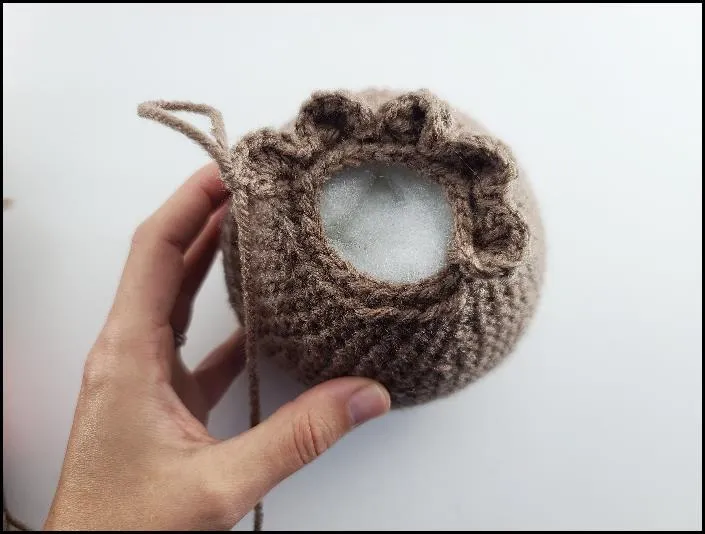
Chain 2 and turn your work. Make 6 double crochet stitches into the same stitch, then slip stitch into the next stitch.
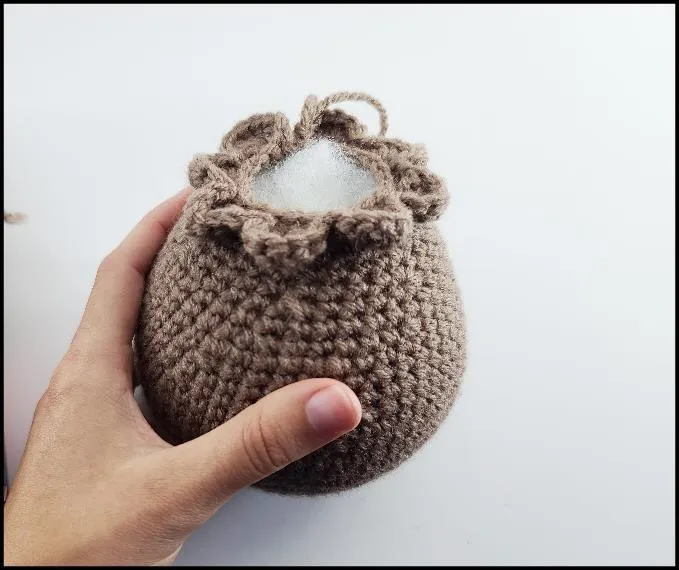
Work 7 double crochet stitches into the same stitch, then slip stitch into the next stitch. Continue repeating from * for the rest of the stitches.
Repeat the sequence of making 7 double crochets in the same stitch and then slip stitching into the next stitch, around the entire row.
F/O and leave a long tail of yarn for sewing.
Wings(Make 2):
With Color D:
1. Work 6 single crochet stitches into a magic ring. Total stitches: 6.
2. Increase in each st around= 12 3-4. Sc in each st around
Do not stuff the wings
5. (sc, inc) x 6= 18
6-7. Sc in each st around
8. (2 sc, inc) x 6= 24
9-13. Sc in each st around
14. (2 sc, dec) x 6= 18
15. (sc, dec) x 6= 12
F/O leave a long tail for sewing. !TIP! Folding the wings in half and single crocheting the opening shut will simplify the sewing process.
Wattle(Make 2):
With Color G:
1.Make 6sc into a magic ring=6
ly behind the second one.
behind the 2nd piece.
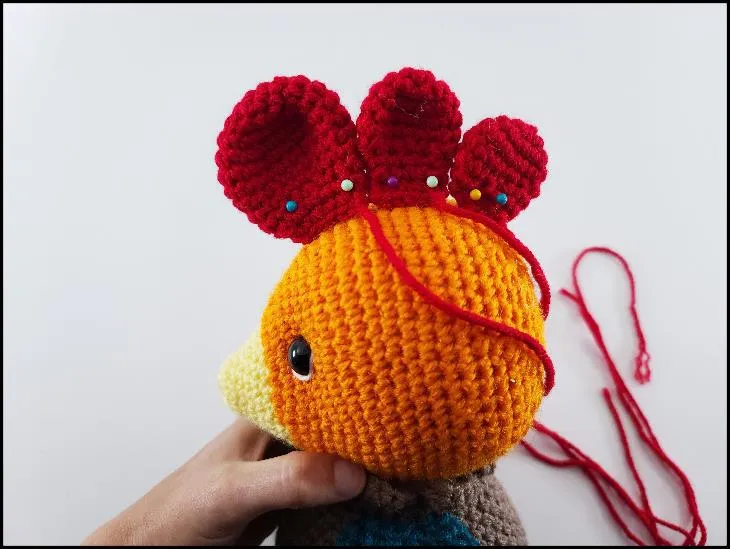
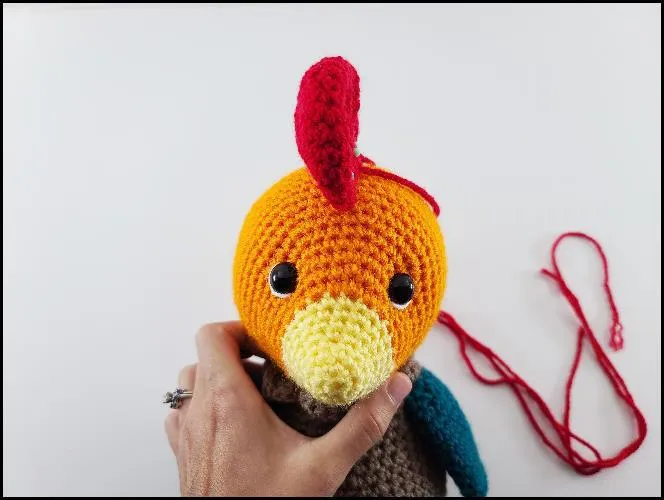
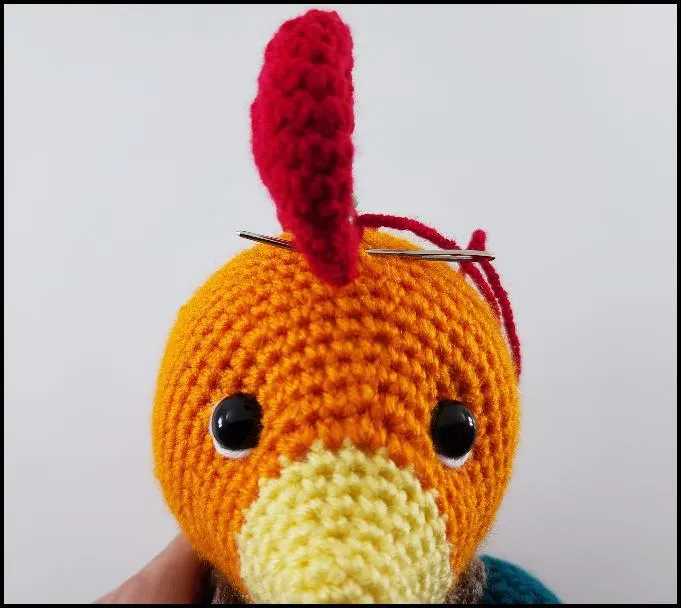
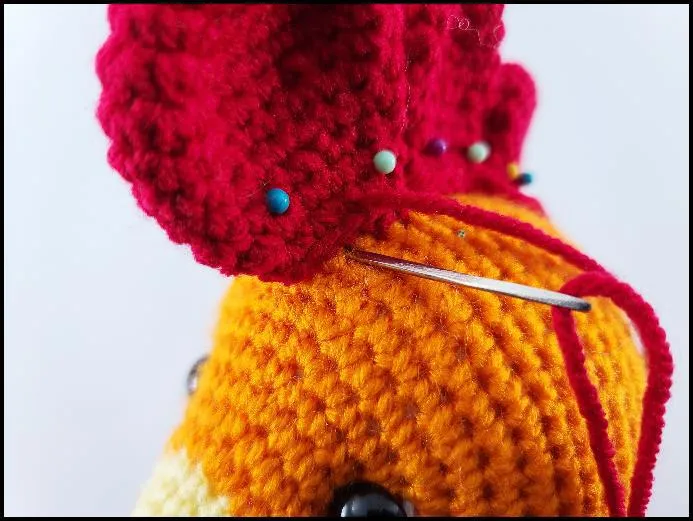
2. Sew the comb onto the head.

Legs:
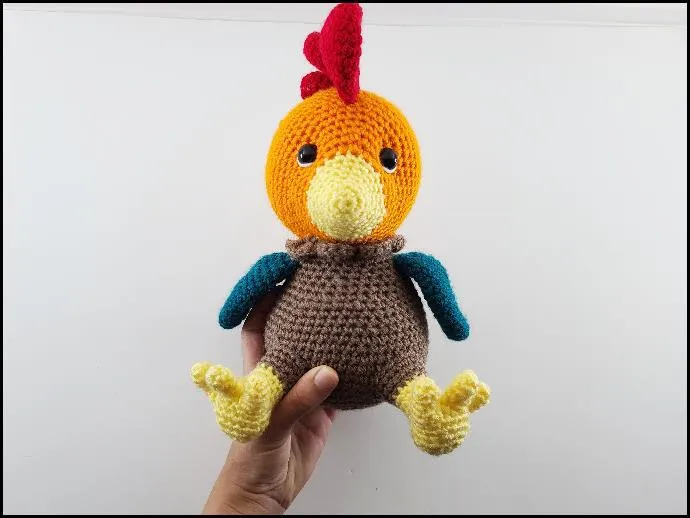
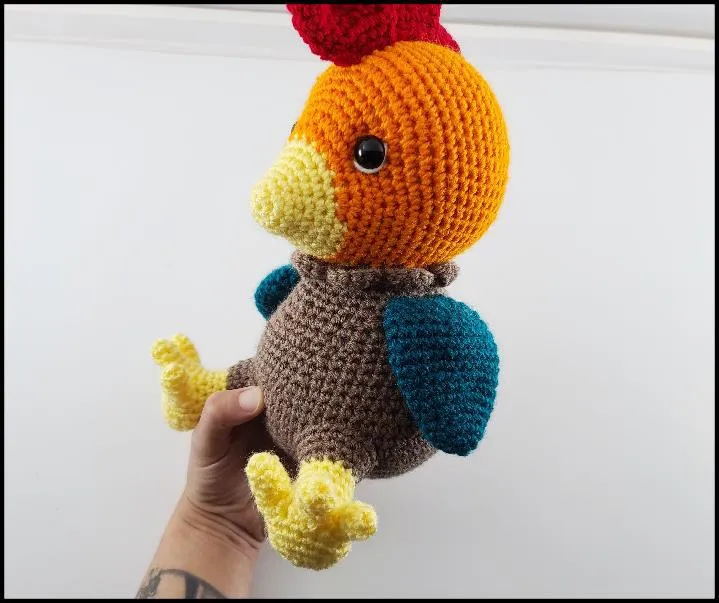
1. Securely attach the legs to the front of the body, placing them approximately between rounds 9 and 14. 2. Sew the legs onto the body.

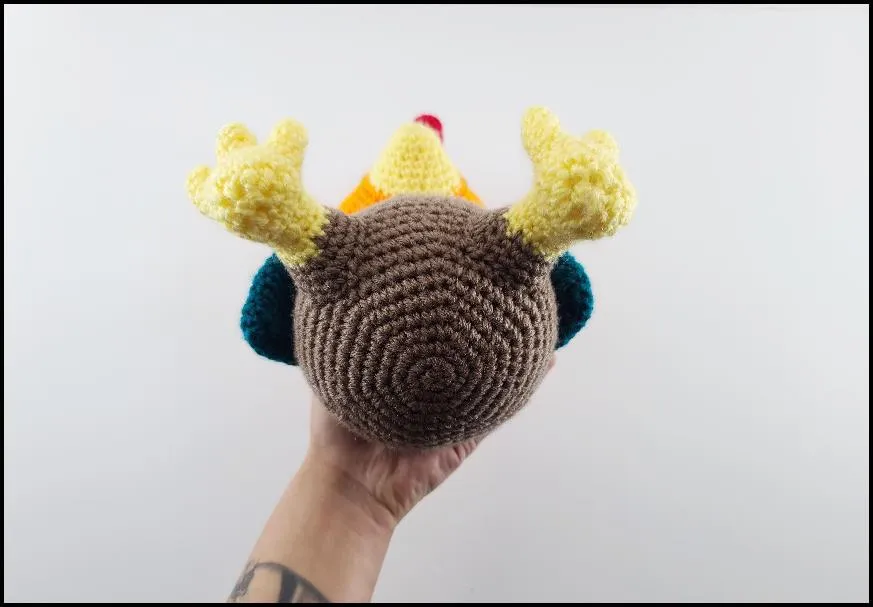
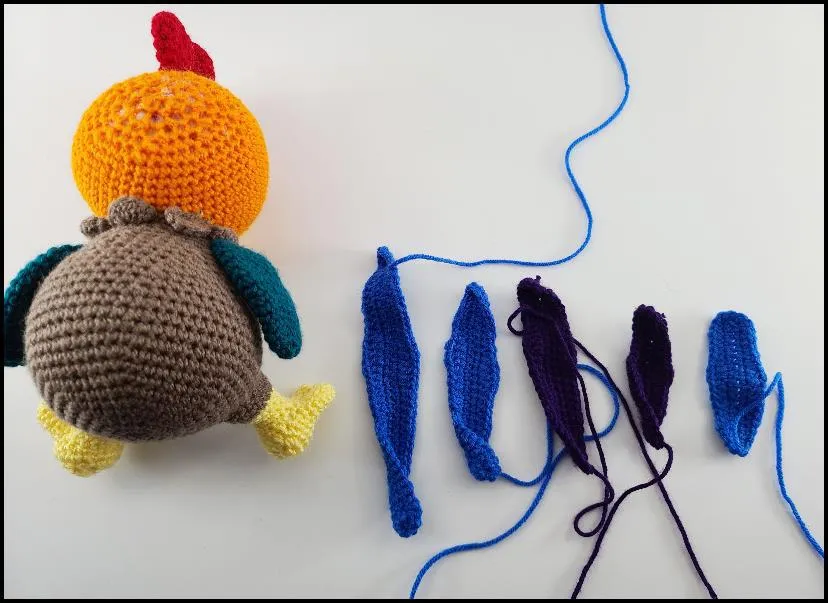
Tail Feathers:
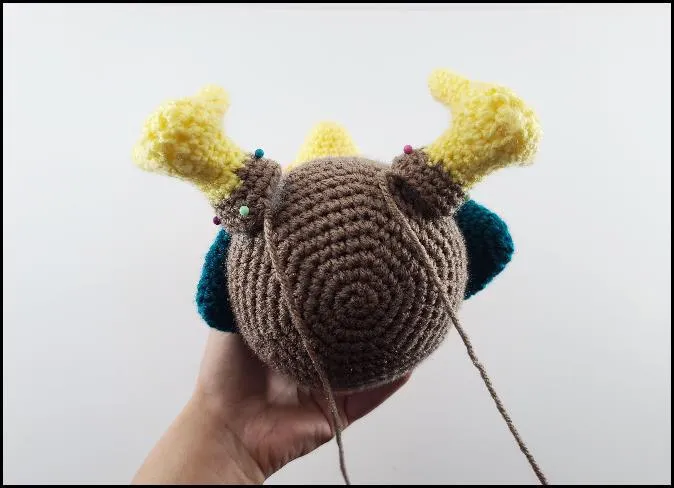
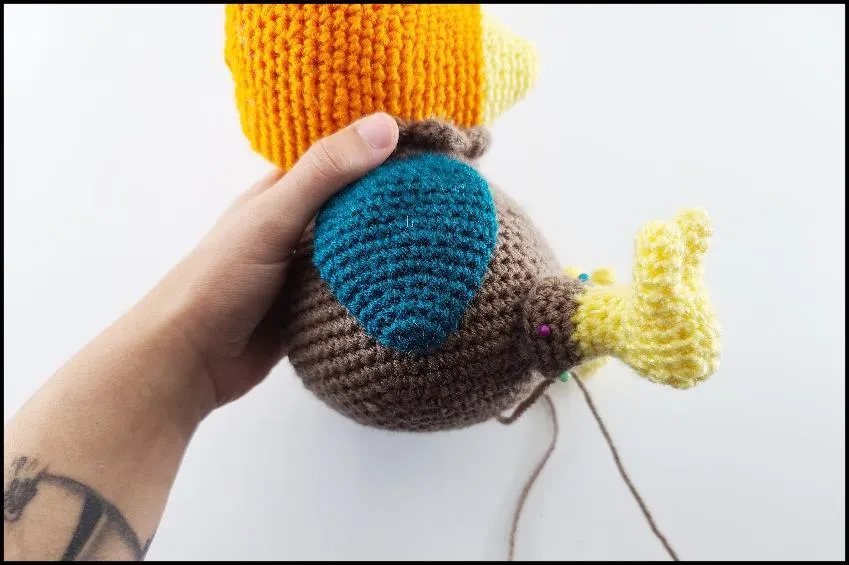
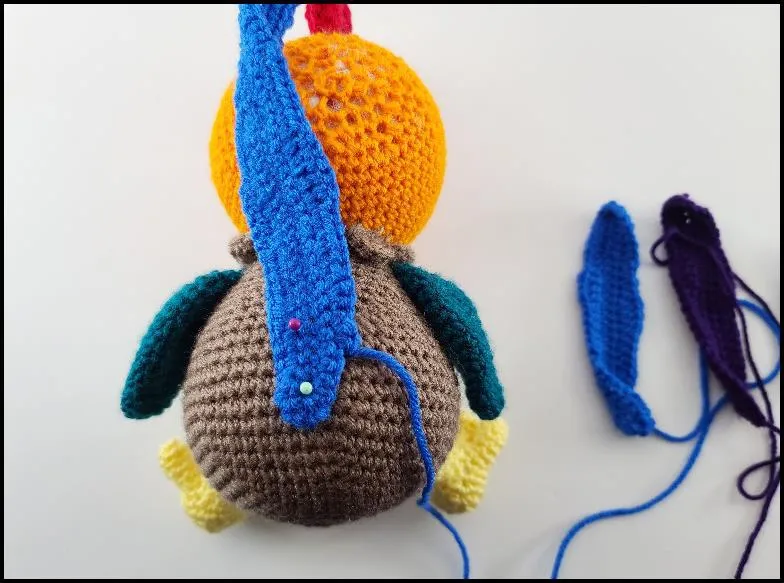
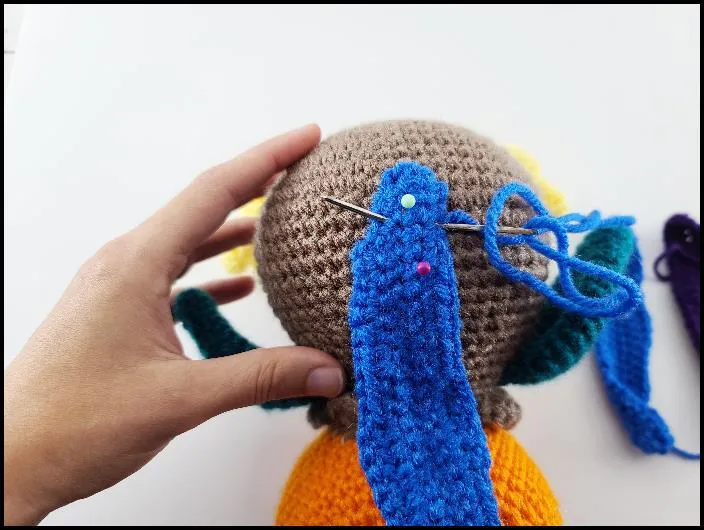
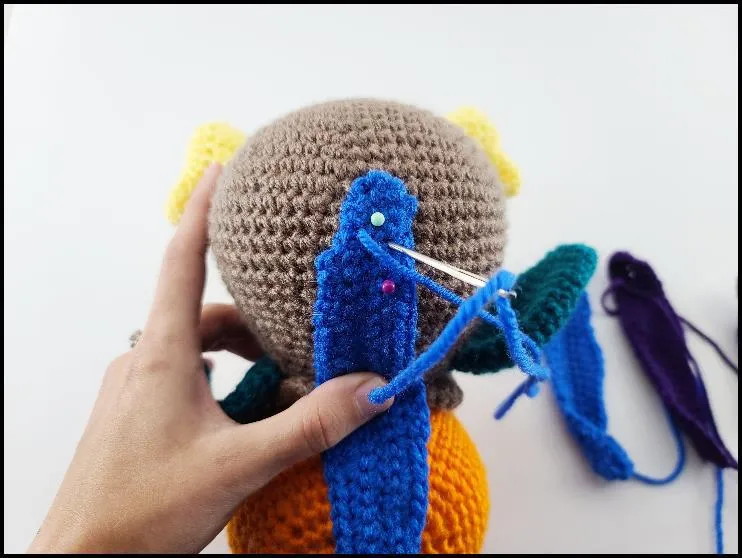
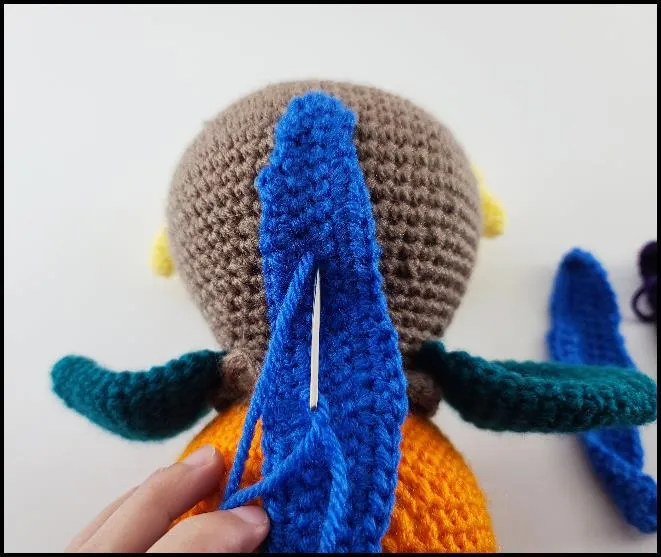
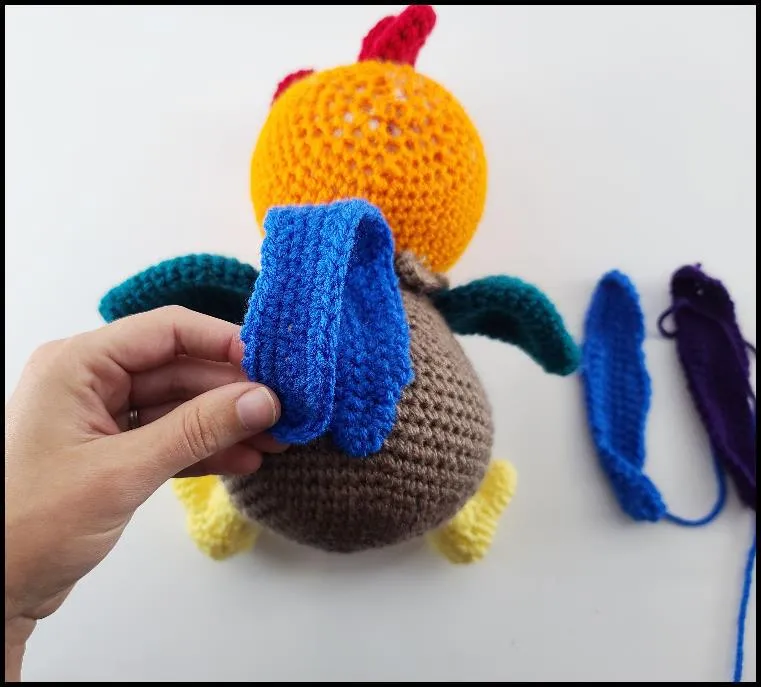
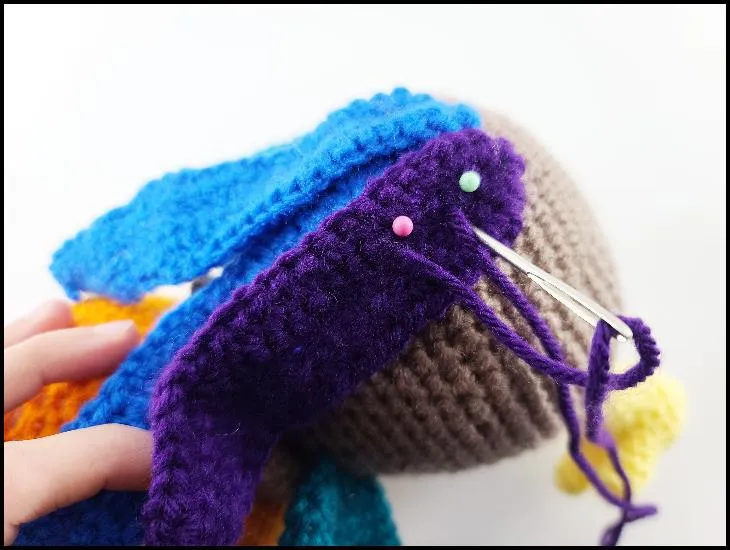
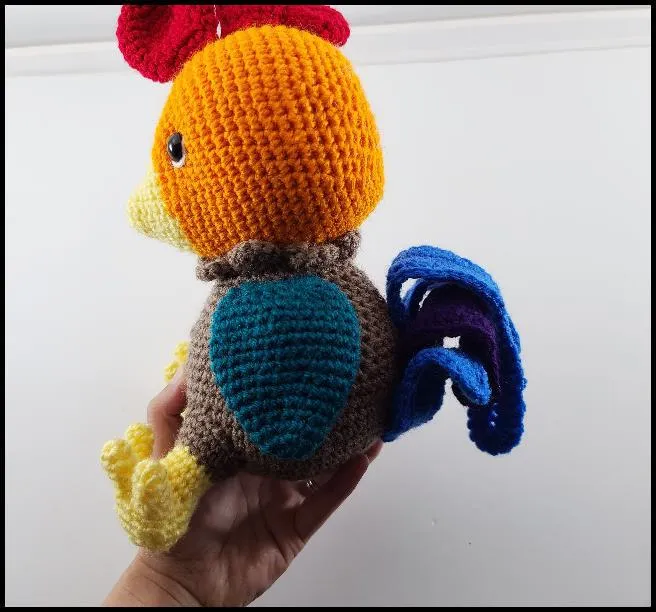
1. Pin the largest tail feather to the back of the body approximately between rounds 9
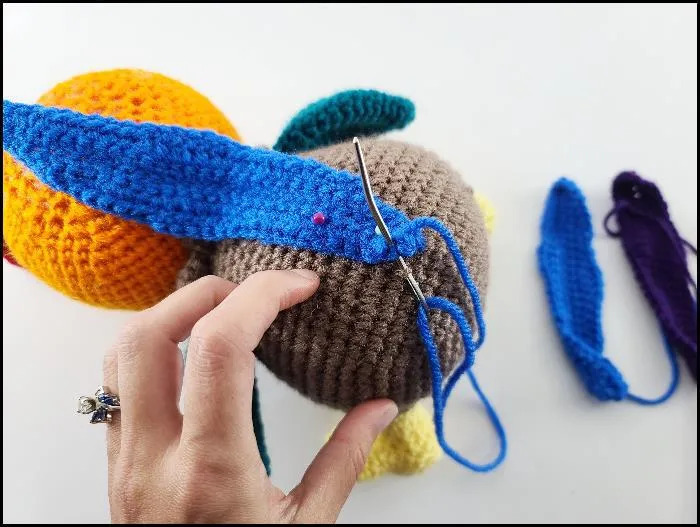
and 10. You’re only securing them with pins, as shown in the picture. For the sewing part. You will only be
sewing where the black dots are in the 3rd picture. In the 6th and 7th pictures, you’ll follow the same steps as shown.
If you want the tail feathers to curl over, sew a stitch in the middle of the feathers.
position the feather approximately three stitches above the bottom. Repeat one more time about 2
stitches higher than that one. Weave in the tails.
2. The 2nd layer will be one purple and one blue medium feathers. Repeat the sewing
process for both. Then, position the two small feathers in layers beneath the medium feather, securing them with pins.
ones.
3. Weave in any yarn tails.






Eyebrows and Wattle:
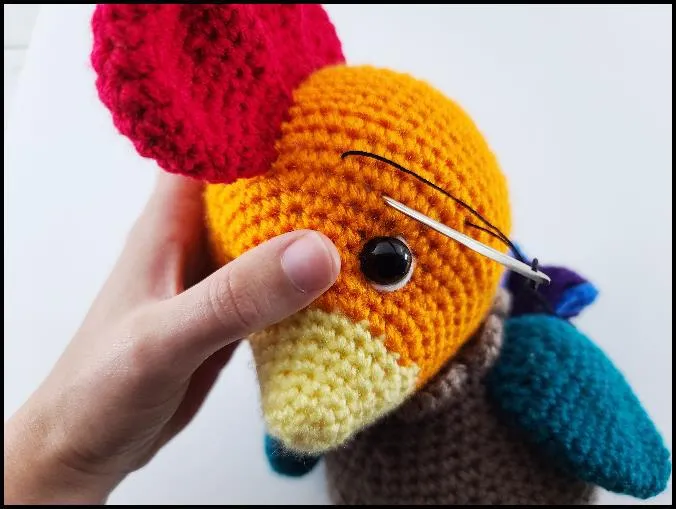
1. Thread your needle with a strand of black embroidery floss. Insert the needle into an opening on the side of the head. Lift the needle to just above the eye, about two rounds up. Embroider the eyebrow and then do the same for the other one. Weave in the tails.
2. Attach the wattle beneath the chin and stitch it to the head.


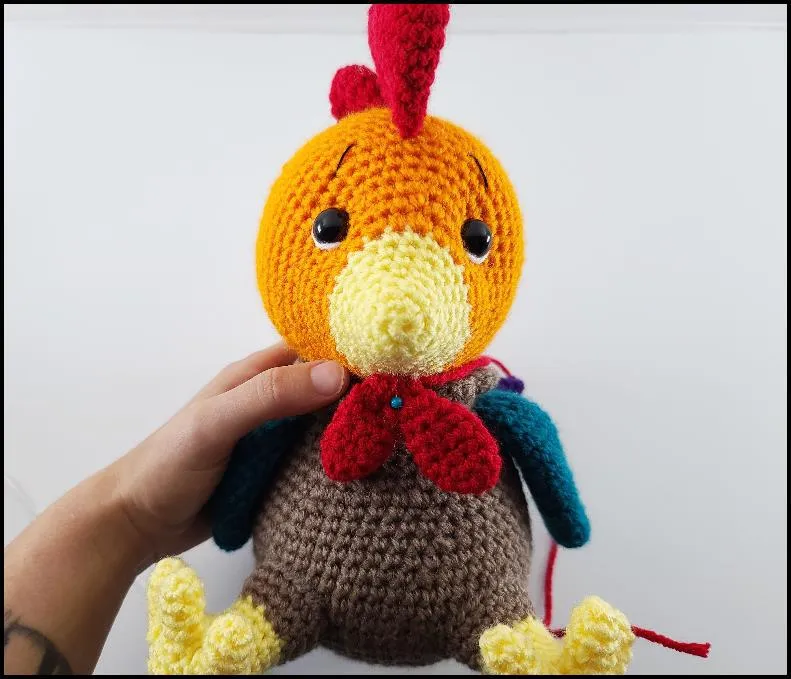

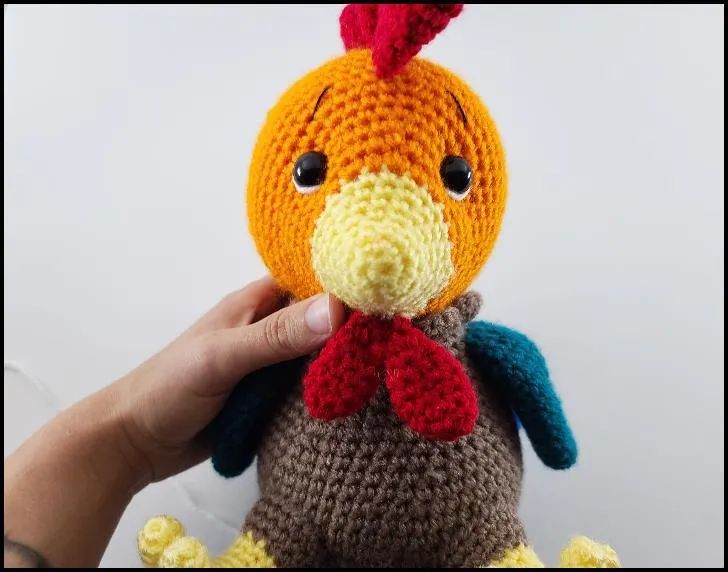
You now have your finished Rooster!
Helpful Tips:
Exact Colors and Brand of Yarn Used:
1. Yellow: Red Heart Daffodil
2. Orange: Red Heart Pumpkin
3. Brown: Red Heart Mushroom
4. Teal: Red Heart Real Teal
5. Blue: Red Heart Comic Blue
6. Purple: Red Heart Amethyst
7. Red: I love this yarn Red
You can use different eye and nose sizes. You may need to tweak the positions if you
change the sizes.
Feel free to use various hook sizes and yarn weights. This will simply alter the size of your rooster.
and you may need to reposition the eyes and nose.
How you stuff matters! The type of stuffing you choose and your stuffing technique all influence how your
rooster turns out. I prefer using Polyfil stuffing, but other types are also suitable.
Additional Information
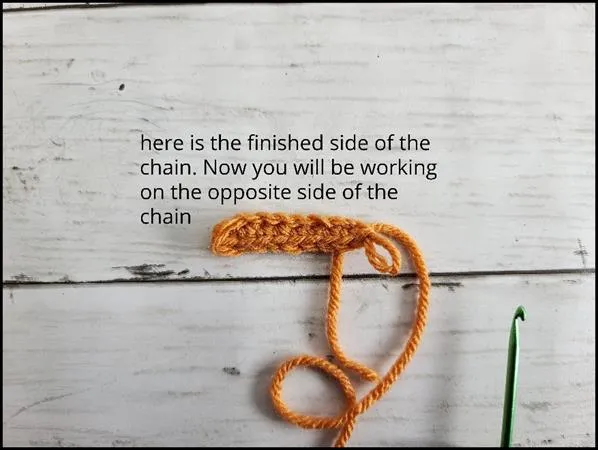
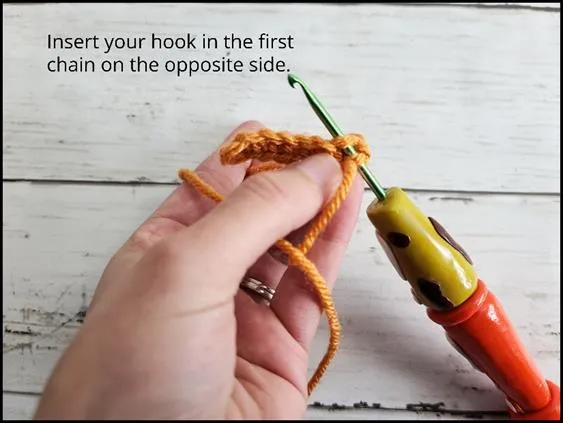
How to operate on the reverse side of the chain:
This is an example picture!
1. Complete the specified number of stitches along the first side of your chain.
2. Flip the chain over and work the specified number of stitches on the reverse side of the chain.

Share the loveRooster Crochet Pattern Details Size: The finished height from the base of the foot to the top of the head is 13 inches, using weight 4 yarn and a 3.25 mm crochet hook. Skill Level Needed: Intermediate – appropriate for beginner crocheters, demands patience and careful attention during assembly.the rooster and basic crochet…
