🦌 Rudolph Stocking Pattern
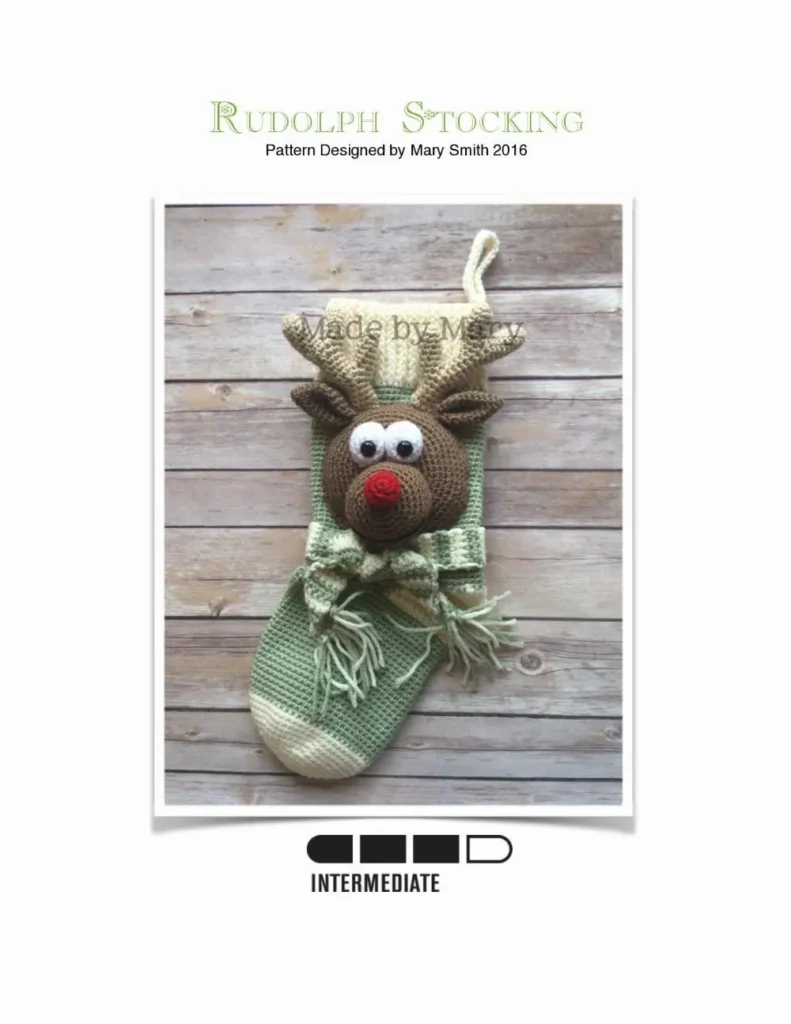
The finished stocking is about 16″ long if using worsted weight yarn.
📚 Before You Begin
- This stocking is worked in continuous rounds.
- Mark the beginning of each round with a stitch marker.
- Use the “magic ring” when starting rounds.
- Gauge is not important as long as you are consistent with your tension.
- TIP for Color Changes: Always change colors in the stitch BEFORE the color change by pulling the new color through the 2 loops, thus beginning with the correct color on your hook.
- This project is made with all sc stitches unless otherwise specified.
🔑 Abbreviations
| Abbreviation | Meaning |
| ch | chain |
| sc | single crochet |
| hdc | half double crochet |
| dc | double crochet |
| inc | increase (sc 2 times in the next stitch) |
| dec | decrease (stitch next 2 stitches together) |
| fhdc | foundation half double crochet |
| fphdc | front post half double crochet |
| bphdc | back post half double crochet |
| sl st | slip stitch |
| st(s) | stitch(es) |
| sk | skip chain or stitch |
| sp | space |
| BLO | back loop only |
| FLO | front loop only |
| R | Round |
| [ ] | repeat work as directed |
| ( ) | number of stitches you should have at the end of the round |
| FO | finish off |
| MR | magic ring |
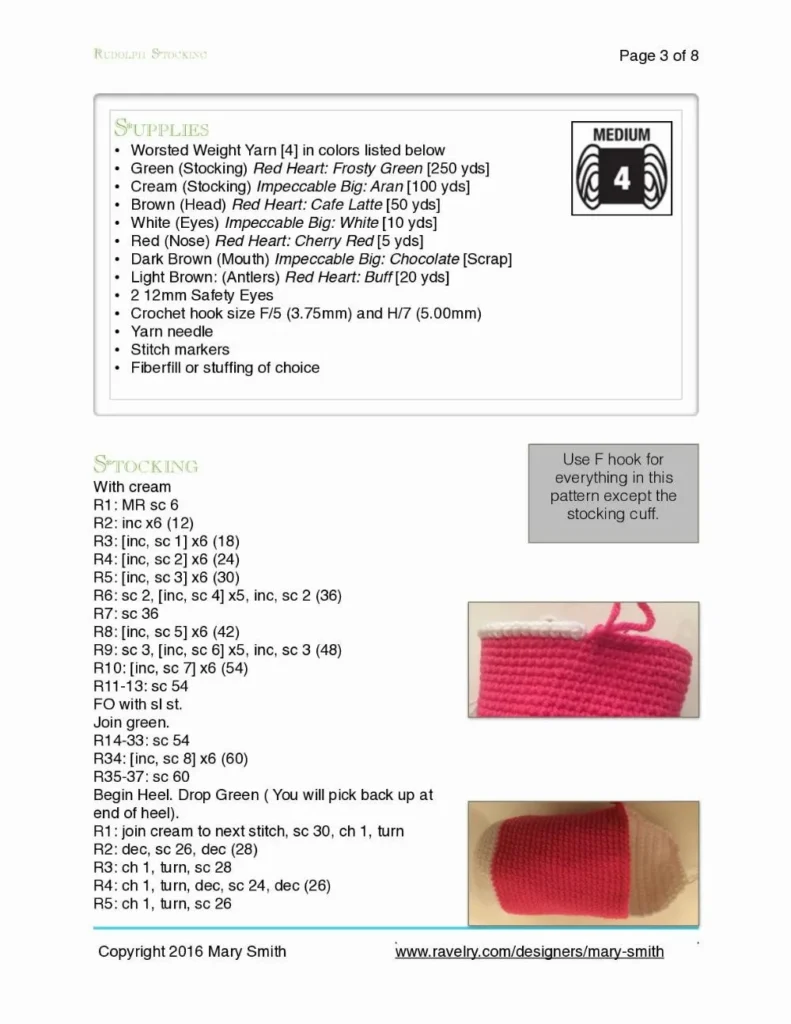
🧶 Supplies (Worsted Weight Yarn [4])
| Color | Recommended Yarn | Amount | Component |
| Green | Red Heart: Frosty Green | 250 yds | Stocking |
| Cream | Impeccable Big: Aran | 100 yds | Stocking Cuff, Heel |
| Brown | Red Heart: Cafe Latte | 50 yds | Head, Ears |
| White | Impeccable Big: White | 10 yds | Eyes |
| Red | Red Heart: Cherry Red | 5 yds | Nose |
| Dark Brown | Impeccable Big: Chocolate | Scrap | Mouth |
| Light Brown | Red Heart: Buff | 20 yds | Antlers |
Other Supplies:
- Crochet hook size F/5 (3.75mm) and H/7 (5.00mm)
- Yarn needle
- Stitch markers
- Fiberfill or stuffing of choice
- 2 – 12mm Safety Eyes
I. Stocking Base (Use F Hook unless otherwise specified)
A. Stocking Toe (Cream Color)
| R | Pattern | Stitches (St) |
| R1 | MR sc 6 | (6) |
| R2 | inc x 6 | (12) |
| R3 | [inc, sc 1] x 6 | (18) |
| R4 | [inc, sc 2] x 6 | (24) |
| R5 | [inc, sc 3] x 6 | (30) |
| R6 | sc 2, [inc, sc 4] x 5, inc, sc 2 | (36) |
| R7 | sc 36 | (36) |
| R8 | [inc, sc 5] x 6 | (42) |
| R9 | sc 3, [inc, sc 6] x 5, inc, sc 3 | (48) |
| R10 | [inc, sc 7] x 6 | (54) |
| R11-13 | sc 54 (3 rounds) | (54) |
| FO with sl st. |
B. Stocking Leg (Green Color)
| R | Pattern | Stitches (St) |
| Join green | ||
| R14-33 | sc 54 (20 rounds) | (54) |
| R34 | [inc, sc 8] x 6 | (60) |
| R35-37 | sc 60 (3 rounds) | (60) |
| Begin Heel. Drop Green (You will pick back up at end of heel). |
C. Heel (White Color)
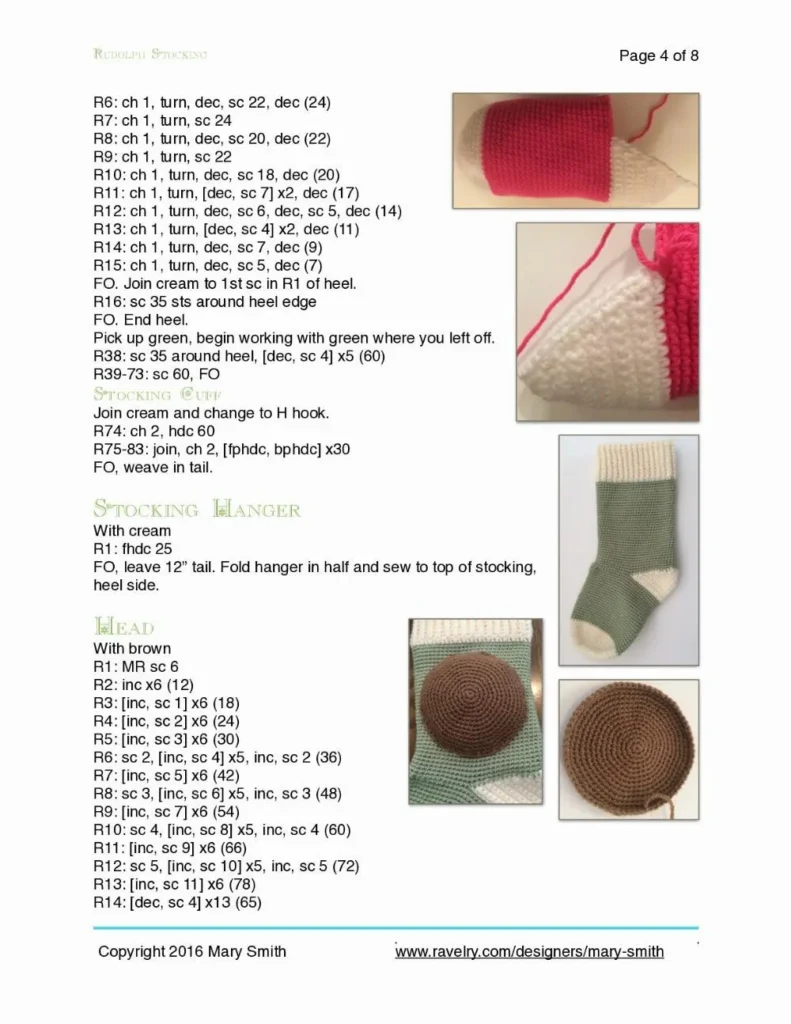
Work in rows back and forth. You will join the cream color to the next stitch, sc 30, ch 1, turn to start R2.
| R | Pattern | Stitches (St) |
| R1 | Join cream to next st, sc 30, ch 1, turn | |
| R2 | dec, sc 26, dec | (28) |
| R3 | ch 1, turn, sc 28 | (28) |
| R4 | ch 1, turn, dec, sc 24, dec | (26) |
| R5 | ch 1, turn, sc 26 | (26) |
| R6 | ch 1, turn, dec, sc 22, dec | (24) |
| R7 | ch 1, turn, sc 24 | (24) |
| R8 | ch 1, turn, dec, sc 20, dec | (22) |
| R9 | ch 1, turn, sc 22 | (22) |
| R10 | ch 1, turn, dec, sc 18, dec | (20) |
| R11 | ch 1, turn, [dec, sc 7] x 2, dec | (17) |
| R12 | ch 1, turn, dec, sc 6, dec, sc 5, dec | (14) |
| R13 | ch 1, turn, [dec, sc 4] x 2, dec | (11) |
| R14 | ch 1, turn, dec, sc 7, dec | (9) |
| R15 | ch 1, turn, dec, sc 5, dec | (7) |
| FO cream to 1st sc in R1 of heel. | ||
| Sc 36 sts around heel edge. | ||
| FO White heel. |
D. Stocking Top (Green Color)
| R | Pattern | Stitches (St) |
| Pick up green, begin working with green where you left off. | ||
| R38 | sc 36 around heel, [dec, sc 4] x 5 | (60) |
| R39-73 | sc 60 (35 rounds) | (60) |
| FO, weave in tail. |
E. Stocking Cuff (Cream Color – Use H Hook)
| R | Pattern | Stitches (St) |
| R74 | ch 2, hdc 60 | (60) |
| R75-83 | Join, ch 2, [fphdc, bphdc] x 30 (9 rounds) | |
| FO, weave in tail. |
F. Stocking Hanger (Cream Color)
| R | Pattern | Stitches (St) |
| R1 | fhdc 25 | |
| FO, leave 12″ tail. Fold hanger in half and sew to top of stocking, heel side. |
II. Rudolph Head & Features (Use F Hook)
A. Head (Brown Color)
| R | Pattern | Stitches (St) |
| R1 | MR sc 6 | (6) |
| R2 | inc x 6 | (12) |
| R3 | [inc, sc 1] x 6 | (18) |
| R4 | [inc, sc 2] x 6 | (24) |
| R5 | [inc, sc 3] x 6 | (30) |
| R6 | sc 2, [inc, sc 4] x 5, inc, sc 2 | (36) |
| R7 | sc 3, [inc, sc 5] x 5, inc, sc 3 | (42) |
| R8 | sc 3, [inc, sc 6] x 5, inc, sc 3 | (48) |
| R9 | [inc, sc 7] x 6 | (54) |
| R10 | sc 4, [inc, sc 8] x 5, inc, sc 4 | (60) |
| R11 | [inc, sc 9] x 6 | (66) |
| R12 | sc 5, [inc, sc 10] x 5, inc, sc 5 | (72) |
| R13 | [inc, sc 11] x 6 | (78) |
| R14 | [dec, sc 4] x 13 | (65) |
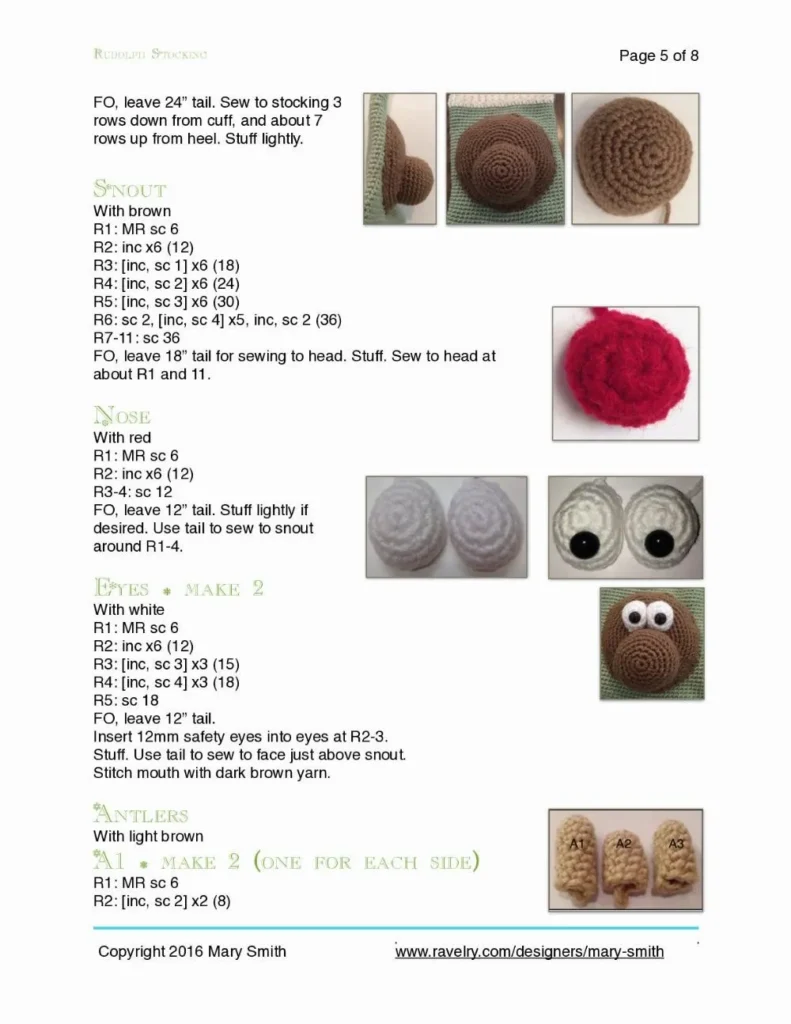
| FO, leave 24″ tail. Sew to stocking 3 rows down from cuff, and about 7 rows up from heel. Stuff lightly. |
B. Snout (Brown Color)
| R | Pattern | Stitches (St) |
| R1 | MR sc 6 | (6) |
| R2 | inc x 6 | (12) |
| R3 | [inc, sc 1] x 6 | (18) |
| R4 | [inc, sc 2] x 6 | (24) |
| R5 | [inc, sc 3] x 6 | (30) |
| R6 | sc 2, [inc, sc 4] x 5, inc, sc 2 | (36) |
| R7 | sc 36 | (36) |
| FO, leave 18″ tail for sewing to head. Stuff. Sew to head at about R1 and 11. |
C. Nose (Red Color)
| R | Pattern | Stitches (St) |
| R1 | MR sc 6 | (6) |
| R2 | inc x 6 | (12) |
| R3-4 | sc 12 (2 rounds) | (12) |
| FO, leave 12″ tail. Stuff lightly if desired. Use tail to sew to snout around R1-4. |
D. Eyes (White Color – Make 2)
| R | Pattern | Stitches (St) |
| R1 | MR sc 6 | (6) |
| R2 | inc x 6 | (12) |
| R3 | [inc, sc 3] x 3 | (15) |
| R4 | [inc, sc 4] x 3 | (18) |
| R5 | sc 18 | (18) |
| FO, leave 12″ tail. Insert 12mm safety eyes at R2-3. Stuff. Use tail to sew to face just above snout. Stitch mouth with dark brown yarn. |
E. Ears (Brown Color – Make 2)
| R | Pattern | Stitches (St) |
| R1 | MR sc 4 | (4) |
| R2 | [inc, sc 1] x 2 | (6) |
| R3 | [inc, sc 2] x 2 | (8) |
| R4 | [inc, sc 3] x 2 | (10) |
| R5 | [inc, sc 4] x 2 | (12) |
| R6 | [inc, sc 5] x 2 | (14) |
| R7 | [inc, sc 6] x 2 | (16) |
| R8 | [inc, sc 7] x 2 | (18) |
| R9 | [inc, sc 8] x 2 | (20) |
| R10 | [dec, sc 2] x 5 | (15) |
| R11 | [dec, sc 1] x 5 | (10) |
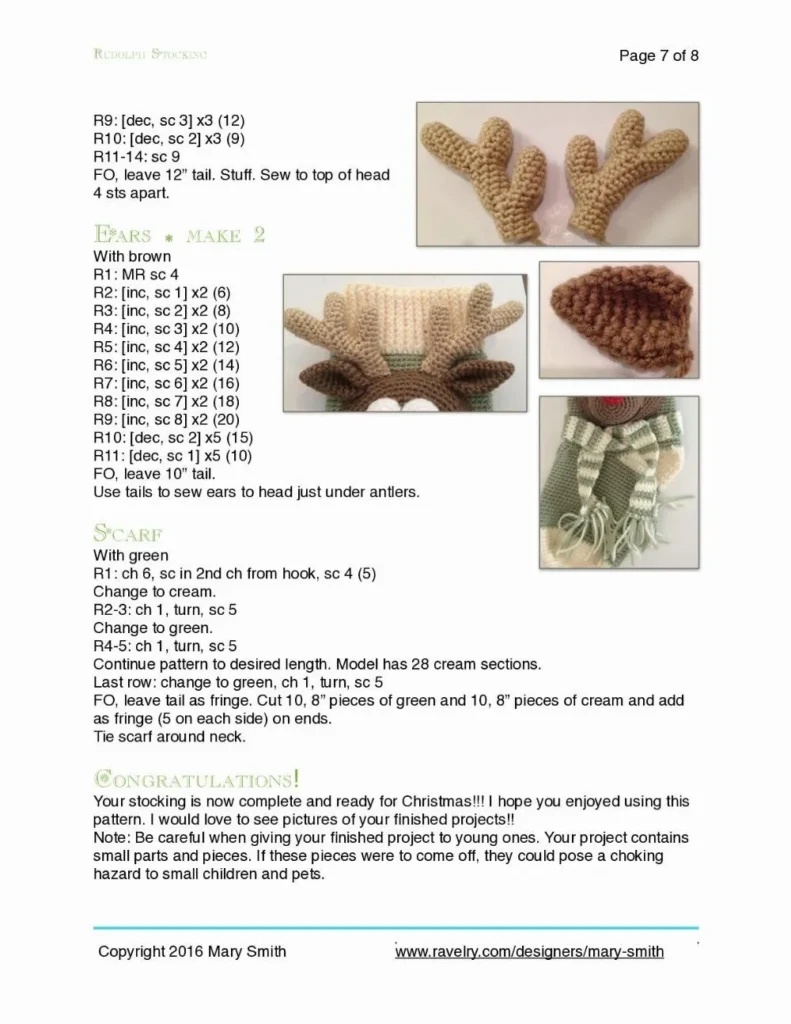
| FO, leave 10″ tail. Use tails to sew ears to head just under antlers. |
F. Antlers (Light Brown Color – Make 2)
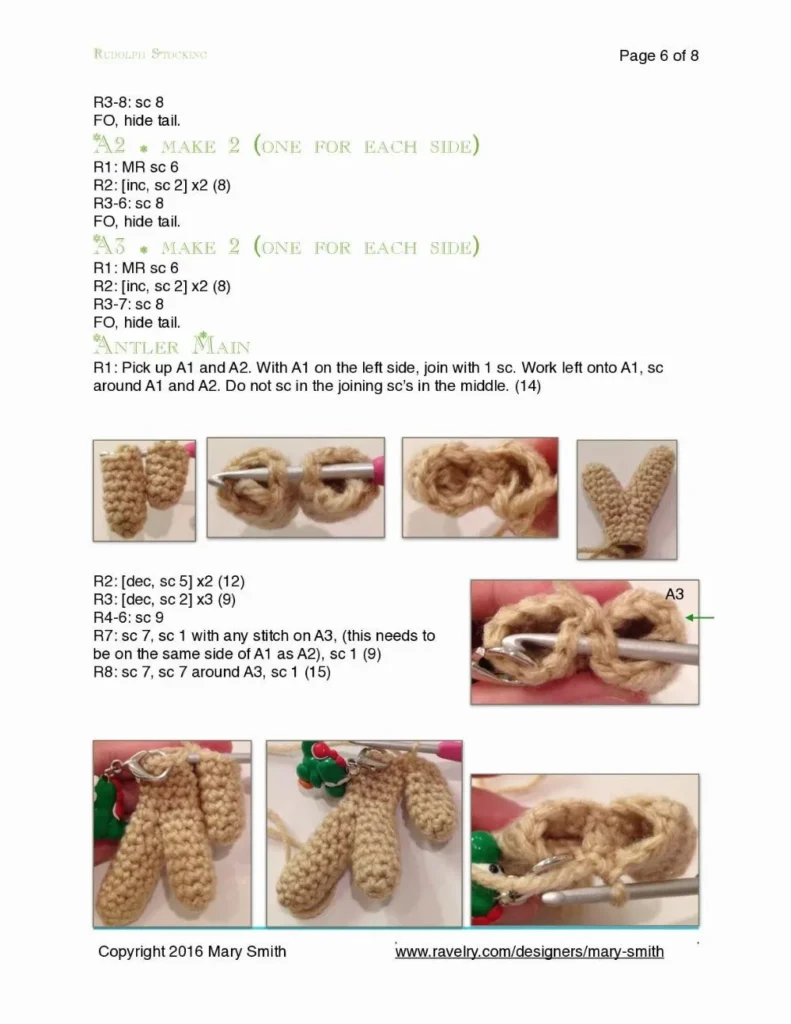
Antlers consist of three pieces (A1, A2, A3) joined together.
Antler Piece A1 (Make 2 – One for Each Side)
| R | Pattern | Stitches (St) |
| R1 | MR sc 6 | (6) |
| R2 | [inc, sc 2] x 2 | (8) |
| R3-8 | sc 8 (6 rounds) | (8) |
| FO, hide tail. |
Antler Piece A2 (Make 2 – One for Each Side)
| R | Pattern | Stitches (St) |
| R1 | MR sc 6 | (6) |
| R2 | [inc, sc 2] x 2 | (8) |
| R3-6 | sc 8 (4 rounds) | (8) |
| FO, hide tail. |
Antler Piece A3 (Make 2 – One for Each Side)
| R | Pattern | Stitches (St) |
| R1 | MR sc 6 | (6) |
| R2 | [inc, sc 2] x 2 | (8) |
| R3-7 | sc 8 (5 rounds) | (8) |
| FO, hide tail. |
Antler Main
With A1 on the left side:
| R | Pattern | Stitches (St) |
| :—: | :— | :—: |
| R1 | Pick up A1 and A2. Join with 1 sc. Work left onto A1, sc around A1 and A2. Do not sc in the joining sc’s in the middle. | (14) |
| R2 | [dec, sc 5] x 2 | (12) |
| R3 | [dec, sc 2] x 3 | (9) |
| R4-6 | sc 9 (3 rounds) | (9) |
| R7 | sc 7, sc 1 with any stitch on A3, (this needs to be on the same side of A1 as A2), sc 1 | (9) |
| R8 | sc 7, sc 7 around A3, sc 1 | (15) |
| R9 | [dec, sc 3] x 3 | (12) |
| R10 | [dec, sc 2] x 3 | (9) |
| R11-14 | sc 9 (4 rounds) | (9) |
| | FO, leave 12″ tail. Stuff. Sew to top of head 4 sts apart. | |
III. Scarf
(With Green yarn)
| R | Pattern | Stitches (St) |
| R1 | ch 6, sc in 2nd ch from hook, sc 4 | (5) |
| Change to cream. | ||
| R2-3 | ch 1, turn, sc 5 (2 rows) | (5) |
| Change to green. | ||
| R4-5 | ch 1, turn, sc 5 (2 rows) | (5) |
| Continue pattern to desired length. (Model has 28 cream sections). | ||
| Last row | Change to green, ch 1, turn, sc 5 | |
| FO, leave 8″ tails for fringe. Cut 10, 8″ pieces of green and 10, 8″ pieces of cream and add as fringe (5 on each side) on ends. Tie scarf around neck. |
