This pattern is for personal use only. You may sell finished products made from this pattern as long as you credit @yoon.crochets as the designer.
The pattern is worked in continuous rounds, so there’s no need to chain or slip stitch after each row.
🧵 Materials
Yarn: Yarn in 2 different colors (Main Body and Secondary/Feet). Designer used Alize Softy Plus for the green one and YarnArt Dolce Baby for the orange one.
Accessories Yarn (optional).
Hook: Crochet hook (3mm for the orange one and 4.5mm for the green one).
Safety Eyes: (12mm for the orange one and 14mm for the green one).
Tools: Stitch marker, Darning needle, Stuffing, Scissors, Worsted yarn for details on the face (optional).
🔑 Abbreviations
Abbreviation
Meaning
Mr
Magic ring
Sc
Single crochet
Inc
Increase
Dec
Invisible decrease
R
Round/row
St
Stitch
Sl st
Slip stitch
Ch
Chain
Dc
Double crochet
Bobble st
Bobble stitch (4 loops)
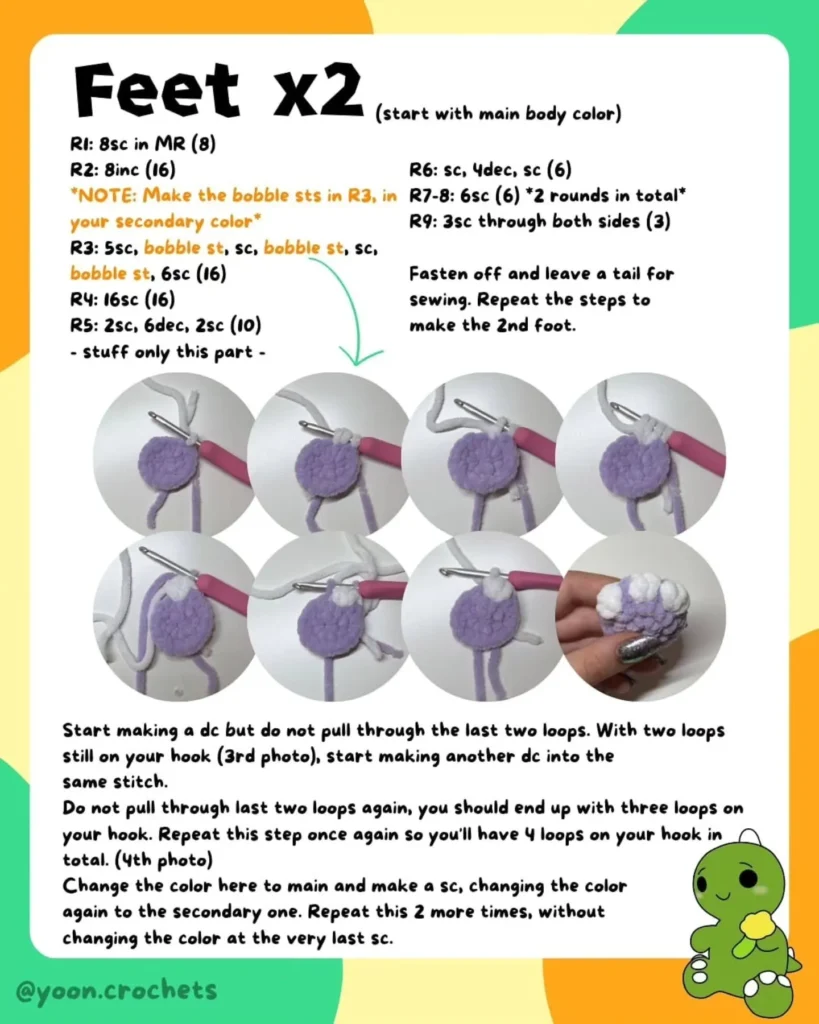
Bobble Stitch Instructions (4 loops): Start making a dc but do not pull through the last two loops. With two loops still on your hook, start making another dc into the same stitch. Do not pull through the last two loops again (you should have three loops on your hook). Repeat this step once again so you’ll have 4 loops on your hook in total. Change the color here to main and make a sc, changing the color again to the secondary one. Repeat this 2 more times, without changing the color at the very last sc.
I. Body Components (No-Sew)
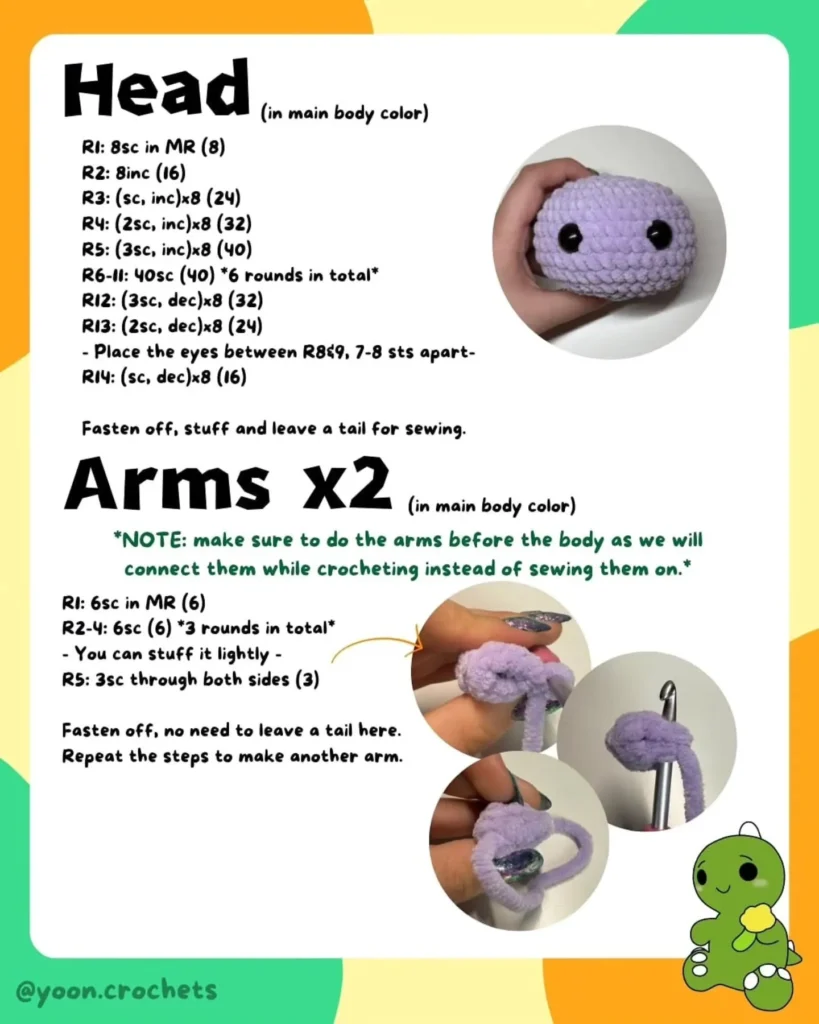
A. Head (in main body color)
R
Pattern
Stitches (St)
R1
8 sc in MR
(8)
R2
8 inc
(16)
R3
(sc, inc) x 8
(24)
R4
(2 sc, inc) x 8
(32)
R5
(3 sc, inc) x 8
(40)
R6-11
40 sc (6 rounds in total)
(40)
R12
(3 sc, dec) x 8
(32)
R13
(2 sc, dec) x 8
(24)
R14
(sc, dec) x 8
(16)
Place the eyes between R8 & R9, 7-8 sts apart.
Fasten off, stuff, and leave a tail for sewing.
B. Arms (x2) (in main body color)
NOTE: Make sure to do the arms before the body as we will connect them while crocheting instead of sewing them on.| R | Pattern | Stitches (St) || :—: | :— | :—: || R1 | 6 sc in MR | (6) || R2-4| 6 sc (3 rounds in total) | (6) || R5 | 3 sc through both sides | (3) || | Fasten off, no need to leave a tail here. Repeat the steps to make another arm. | || | You can stuff it lightly. | |
C. Feet (x2) (start with main body color)
R
Pattern
Stitches (St)
R1
8 sc in MR
(8)
R2
8 inc
(16)
R3
5 sc, bobble st (in secondary color), sc, bobble st, sc, bobble st, 6 sc
(16)
R4
16 sc
(16)
R5
2 sc, 6 dec, 2 sc
(10)
Stuff only this part.
R6
sc, 4 dec, sc
(6)
R7-8
6 sc (2 rounds in total)
(6)
R9
3 sc through both sides
(3)
Fasten off and leave a tail for sewing. Repeat the steps to make the 2nd foot.
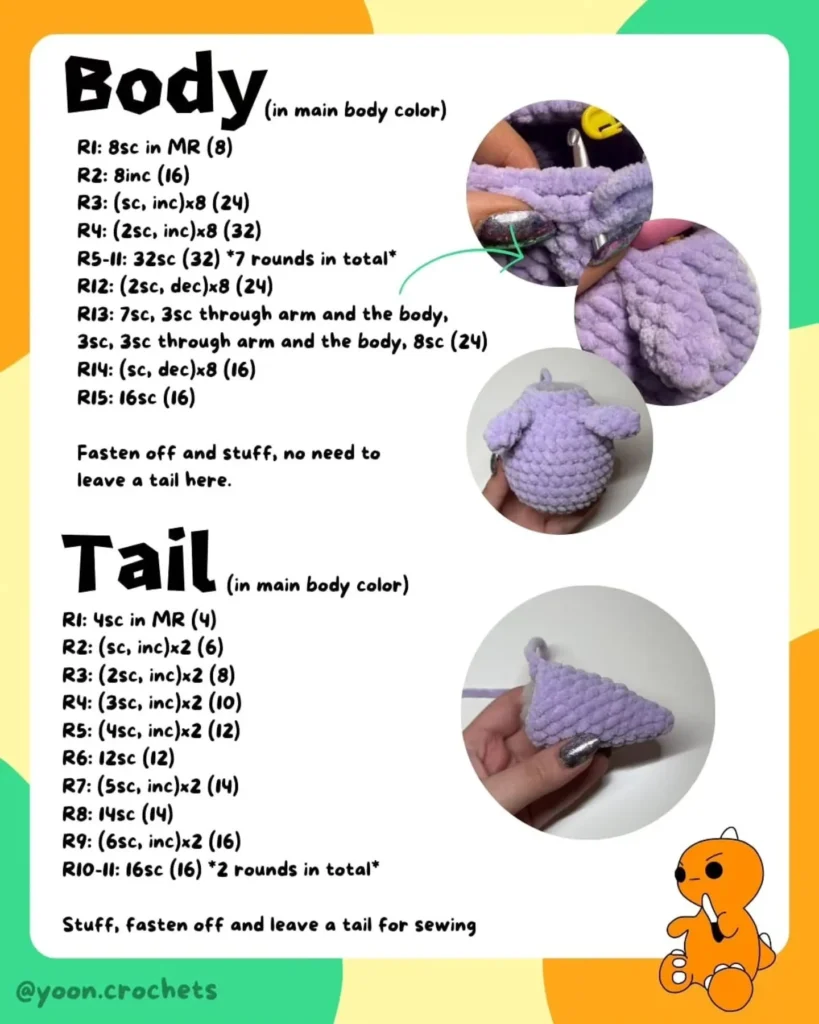
D. Body (in main body color)
Start with the legs attached (R1 is the round where the legs are joined/connected).| R | Pattern | Stitches (St) || :—: | :— | :—: || R1 | 8 sc in MR | (8) || R2 | 8 inc | (16) || R3 | (sc, inc) x 8 | (24) || R4 | (2 sc, inc) x 8 | (32) || R5-11| 32 sc (7 rounds in total) | (32) || R12 | (3 sc, dec) x 8 | (24) || R13 | 7 sc, 3 sc through arm and the body, 3 sc, 3 sc through arm and the body, 8 sc | (24) || R14 | (sc, dec) x 8 | (16) || R15 | 16 sc | (16) || | Fasten off and stuff, no need to leave a tail here. | |
E. Tail (in main body color)
R
Pattern
Stitches (St)
R1
4 sc in MR
(4)
R2
(sc, inc) x 2
(6)
R3
(2 sc, inc) x 2
(8)
R4
(3 sc, inc) x 2
(10)
R5
(4 sc, inc) x 2
(12)
R6
12 sc
(12)
R7
(5 sc, inc) x 2
(14)
R8
14 sc
(14)
R9
(6 sc, inc) x 2
(16)
R10-11
16 sc (2 rounds in total)
(16)
Stuff, fasten off and leave a tail for sewing.
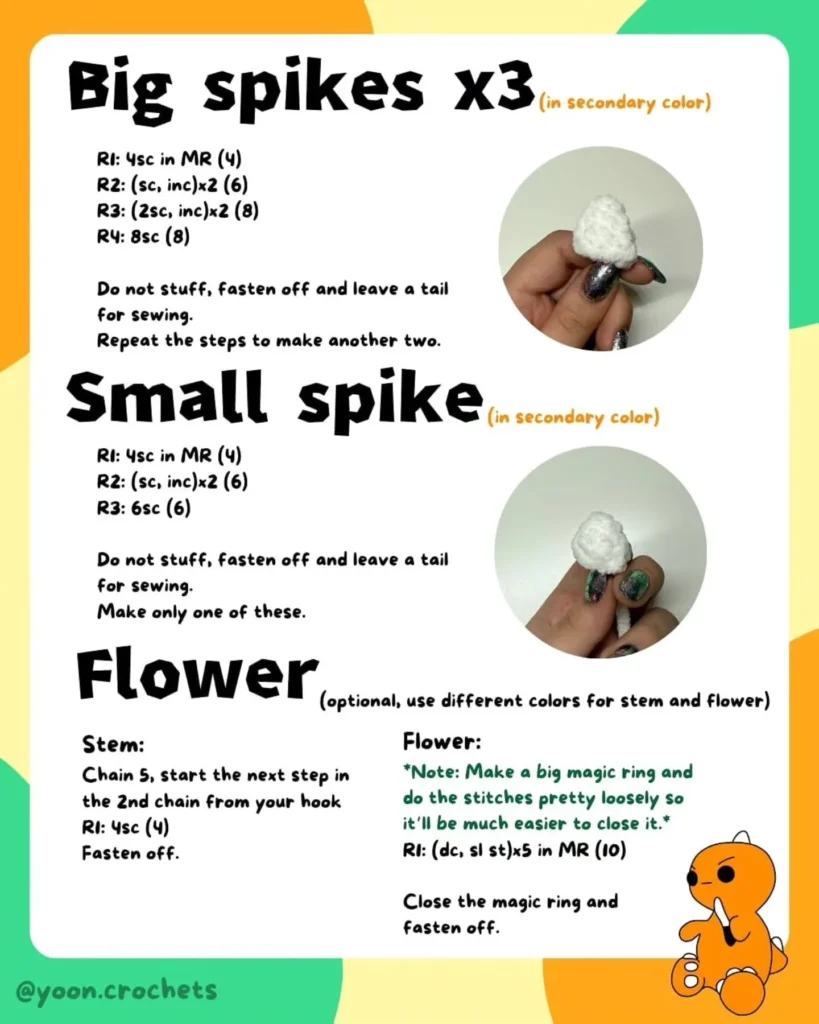
F. Big Spikes (x3) (in secondary color)
R
Pattern
Stitches (St)
R1
4 sc in MR
(4)
R2
(sc, inc) x 2
(6)
R3
(2 sc, inc) x 2
(8)
R4
8 sc
(8)
Do not stuff, fasten off and leave a tail for sewing. Repeat the steps to make another two.
G. Small Spike (Make 1) (in secondary color)
R
Pattern
Stitches (St)
R1
4 sc in MR
(4)
R2
(sc, inc) x 2
(6)
R3
6 sc
(6)
Do not stuff, fasten off and leave a tail for sewing. Make only one of these.
H. Optional Accessories
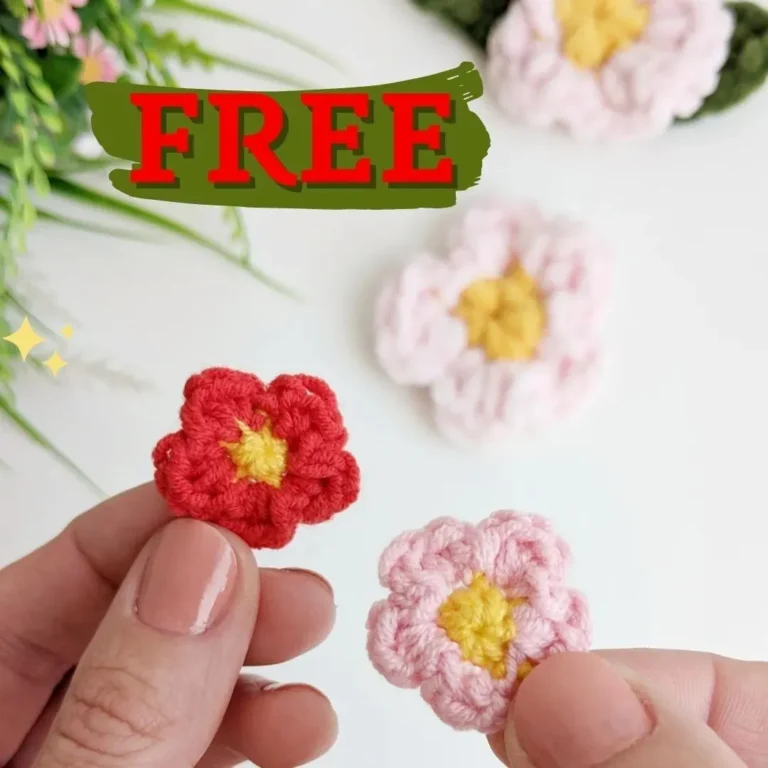
Flower
(Optional, use different colors for stem and flower)
Stem: Chain 5, start the next step in the 2nd chain from your hook. R1: 4 sc. Fasten off.
Flower: Make a big magic ring and do the stitches pretty loosely so it’ll be much easier to close it. R1: (dc, sl st) x 5 (10). Close the magic ring and fasten off.
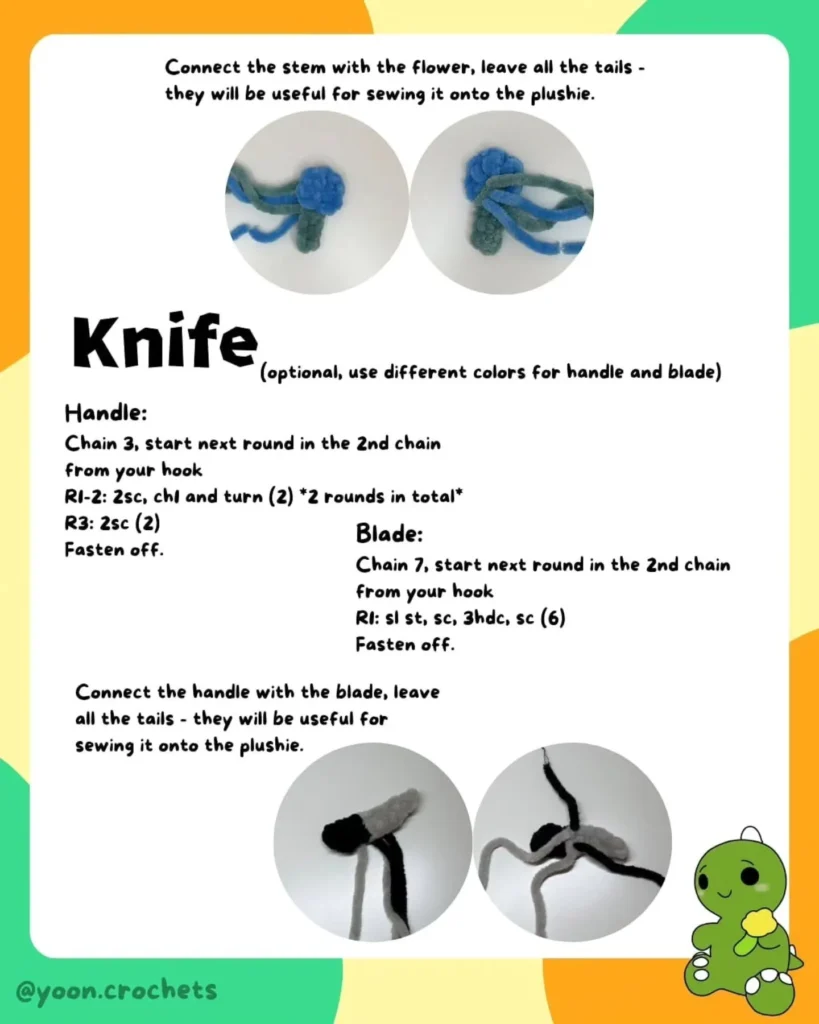
Connect: Connect the stem with the flower, leave all the tails – they will be useful for sewing it onto the plushie.
Knife
(Optional, use different colors for handle and blade)
Handle: Chain 3, start next round in the 2nd chain from your hook. R1-2: 2 sc, ch 1 and turn (2 rounds in total) (2). R3: 2 sc (2). Fasten off.
Blade: Chain 7, start next round in the 2nd chain from your hook. R1: sl st, sc, 3 hdc, sc (6). Fasten off.
Connect: Connect the handle with the blade, leave all the tails – they will be useful for sewing it onto the plushie.
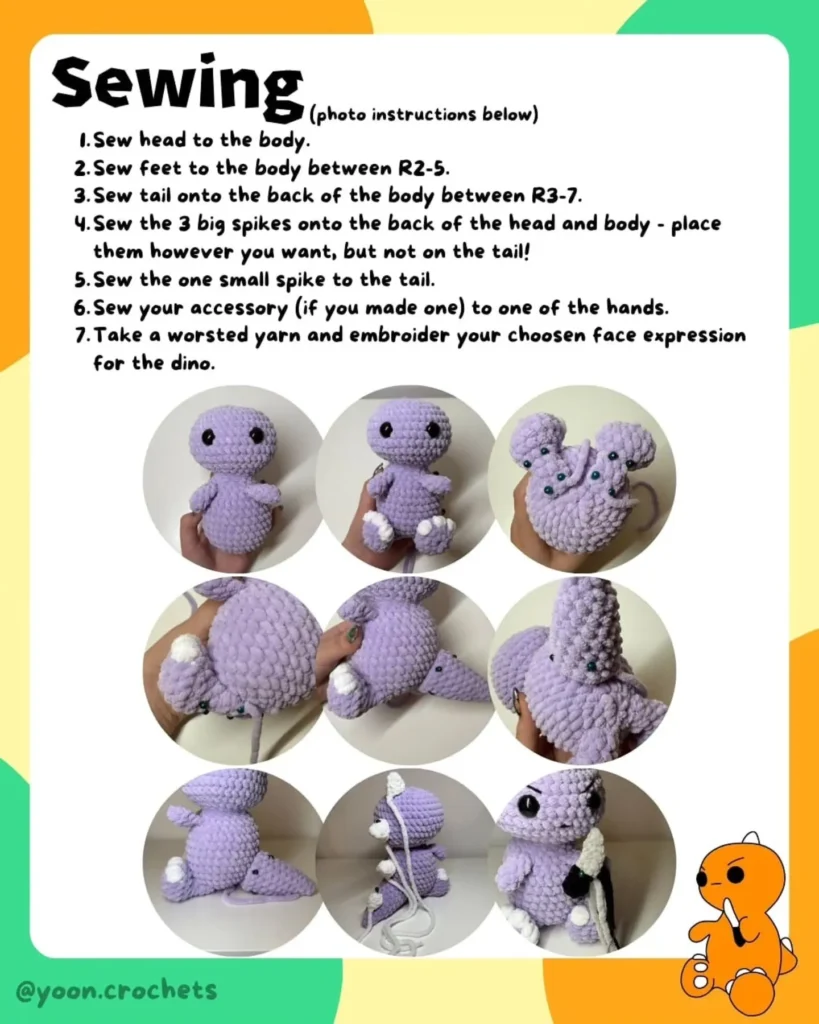
II. Sewing
Sew head to the body.
Sew feet to the body between R2-5.
Sew tail onto the back of the body between R3-7.
Sew the 3 big spikes onto the back of the head and body – place them however you want, but not on the tail.
Sew the one small spike to the tail.
Sew your accessory (if you made one) to one of the hands.
Take a worsted yarn and embroider your chosen face expression for the dino.