Mini No-Sew Turtle – Free Pattern
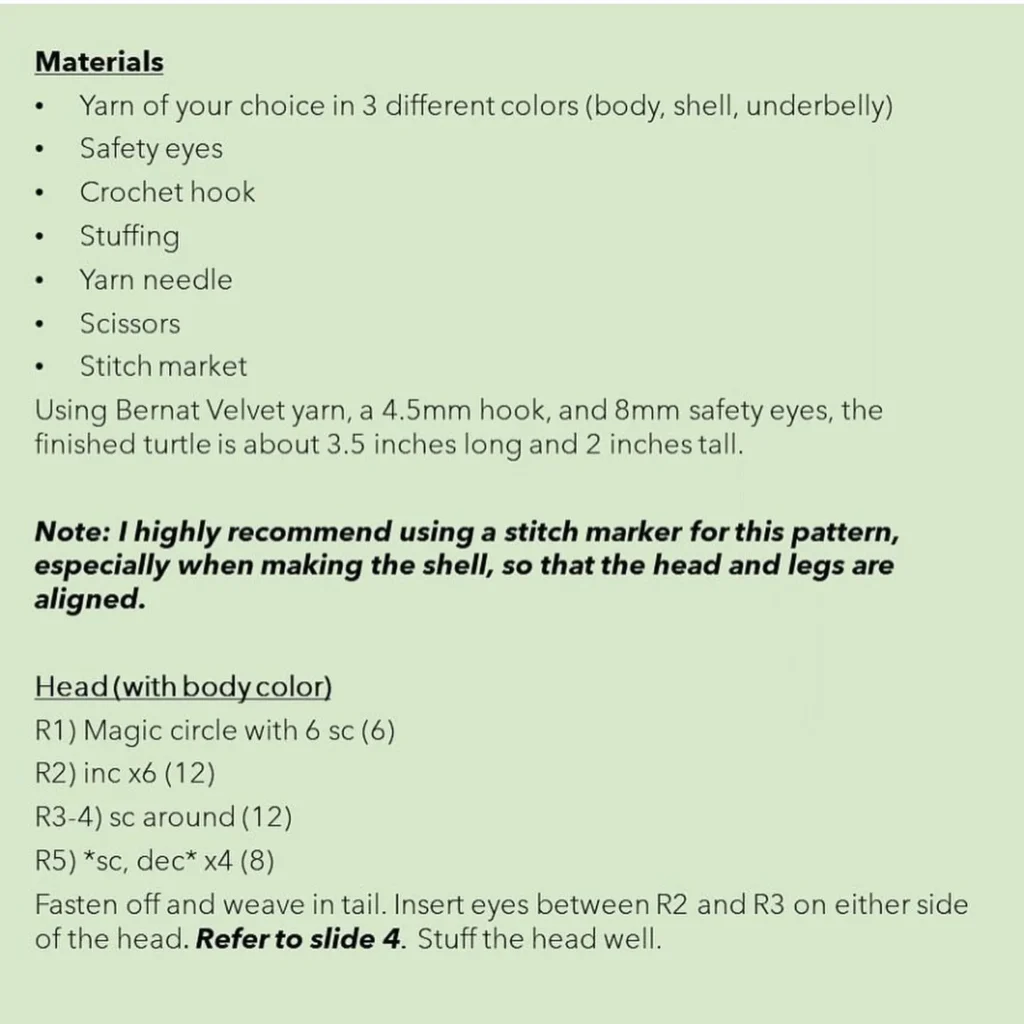
🧵 Materials
- Yarn: Yarn of your choice in 3 different colors (body/head, shell, underbelly).
- (Note: Using Bernat Velvet yarn, a 4.5mm hook, and 8mm safety eyes, the finished turtle is about 3.5 inches long and 2 inches tall.)
- Safety eyes
- Crochet hook
- Stuffing
- Yarn needle
- Scissors
- Stitch marker (Highly recommended for alignment)
- Colors used in pattern: Body Color, Shell Color, Underbelly Color.
🔑 Abbreviations (Standard US Terms)
- sc: single crochet
- inc: increase
- dec: decrease
- FLO: Front Loop Only
- BLO: Back Loop Only
- dc: double crochet
- 5 dc bobble stitch: Bobble stitch made with 5 double crochet (dc) stitches.
I. Head (with Body Color)
| Round | Pattern | Stitches (St) |
| R1 | Magic circle with 6 sc | (6) |
| R2 | inc x 6 | (12) |
| R3-4 | sc around (2 rounds) | (12) |
| R5 | *sc, dec* x 4 | (8) |
| Fasten off and weave in tail. | ||
| Insert eyes between R2 and R3 on either side of the head. | ||
| Stuff the head well. |
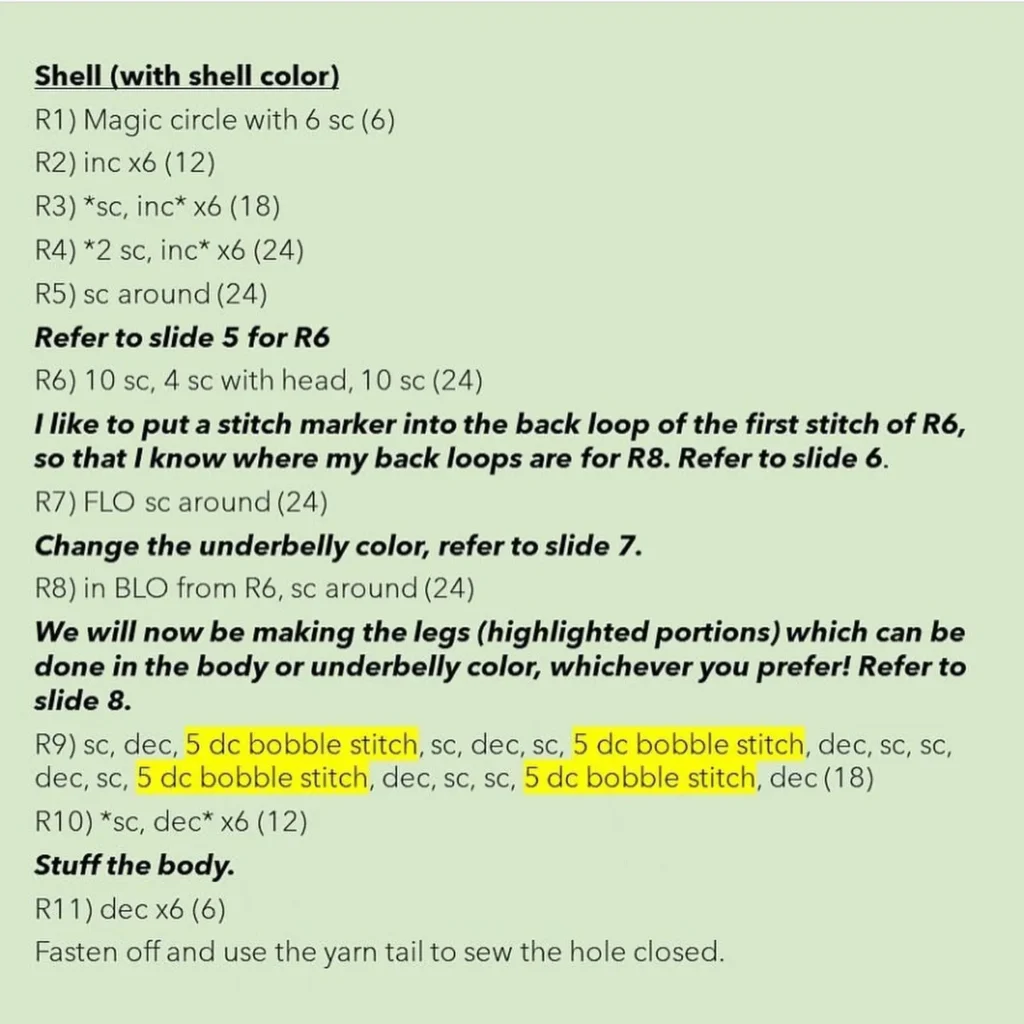
II. Shell and Body (No-Sew Assembly)
(Start with Shell Color)
| Round | Pattern | Stitches (St) |
| R1 | Magic circle with 6 sc | (6) |
| R2 | inc x 6 | (12) |
| R3 | *sc, inc* x 6 | (18) |
| R4 | *2 sc, inc* x 6 | (24) |
| R5 | sc around | (24) |
| R6 | 10 sc, 4 sc with head, 10 sc | (24) |
| The 4 sc with head section attaches the head piece (Head R5) to the shell piece. | ||
| I like to put a stitch marker into the back loop of the first stitch of R6, so that I know where my back loops are for R8. | ||
| R7 | FLO sc around | (24) |
| Change the Underbelly Color. | ||
| R8 | In BLO from R6, sc around | (24) |
| We will now be making the legs (highlighted portions) which can be done in the body or underbelly color, whichever you prefer. | ||
| R9 (Legs) | sc, dec, 5 dc bobble stitch, sc, dec, 5 dc bobble stitch, dec, sc, sc, 5 dc bobble stitch, dec, sc, sc, 5 dc bobble stitch, dec | (18) |
| R10 | *sc, dec* x 6 | (12) |
| Stuff the body. | ||
| R11 | dec x 6 | (6) |
| Fasten off and use the yarn tail to sew the hole closed. |
Assembly Notes
- The head is attached during R6 of the shell by single crocheting through both the shell stitches and the stitches of the head’s base.
- The underbelly color starts in R8 by crocheting into the unused Back Loops of R6. This creates the clean separation and base for the legs/underbelly.