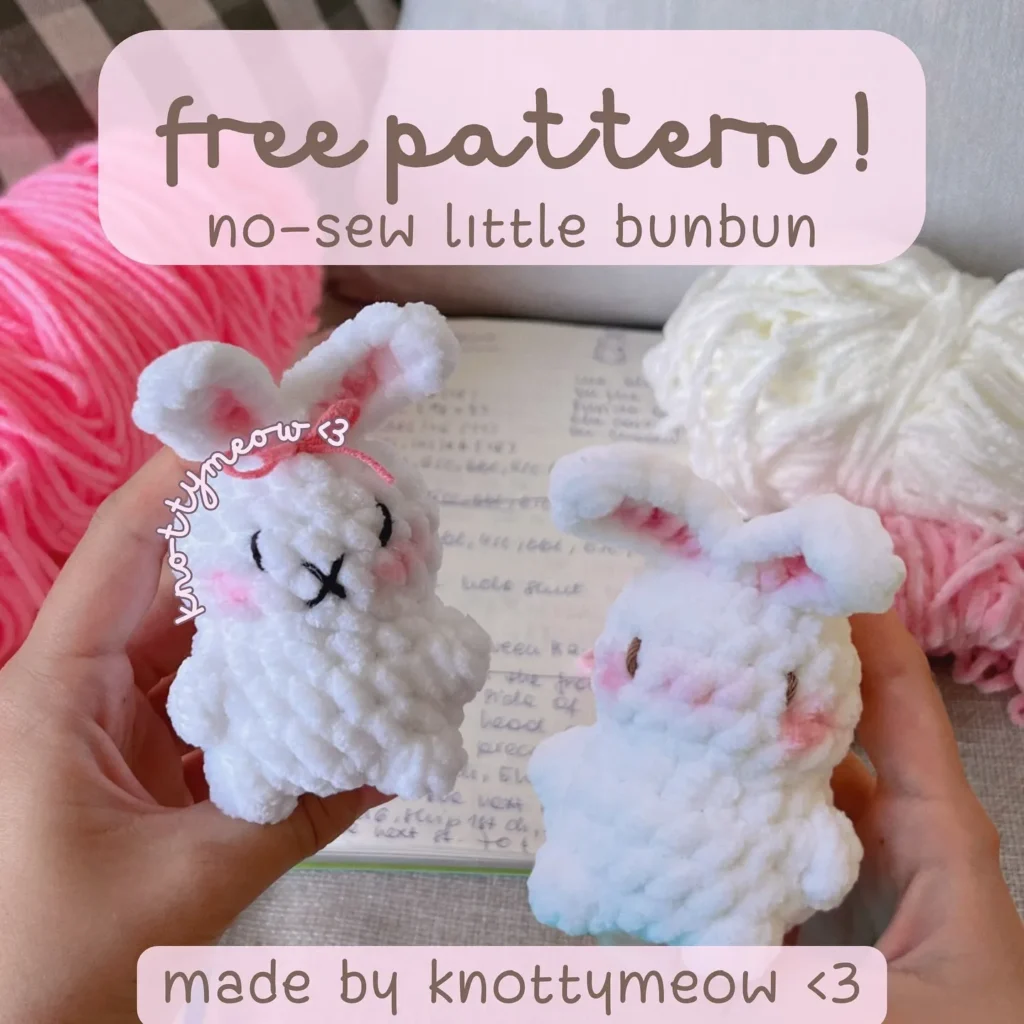
No-Sew Little Bunbun Plushie – Free Pattern
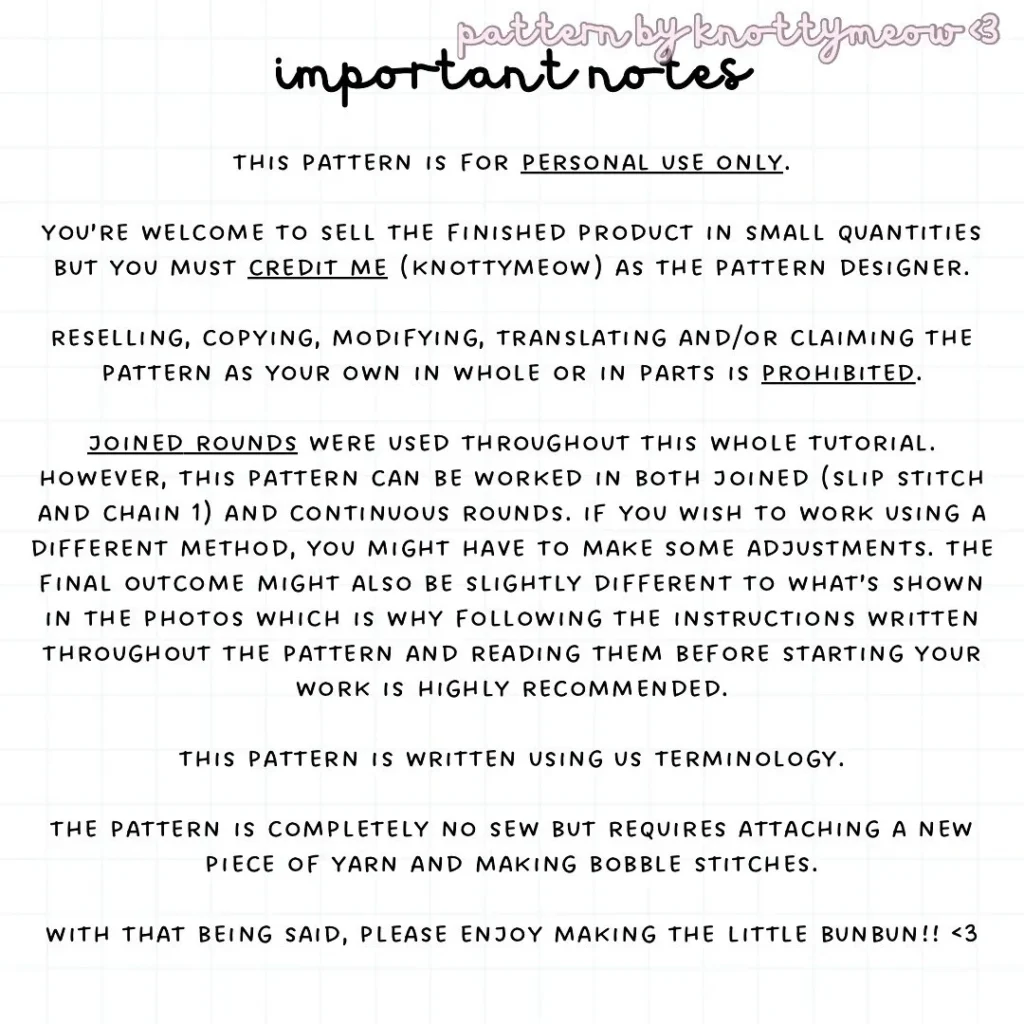
📚 Important Notes
- This pattern is for personal use only.
- You may sell the finished product in small quantities but you must credit knottyimeow as the pattern designer.
- The pattern uses joined rounds (slip stitch and chain 1 at the end of the round), but can be worked in continuous rounds with slight adjustments.
- The pattern is completely no sew but requires attaching a new piece of yarn for the ears and making bobble stitches.
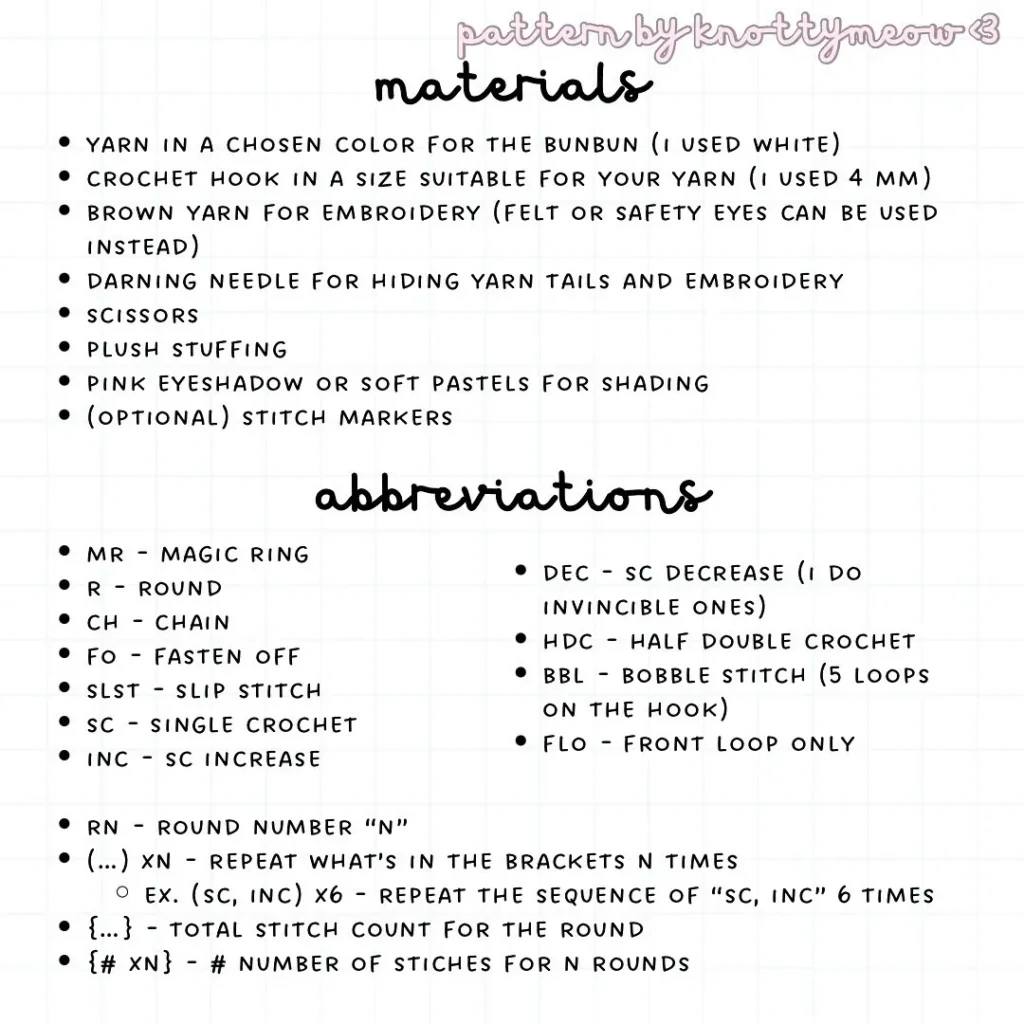
🧵 Materials & Tools
- Yarn: Yarn in a chosen color for the Bunbun (white used in photo)
- Hook: Crochet hook in a size suitable for your yarn (4mm used in photo)
- Brown yarn for embroidery (felt or safety eyes can be used instead)
- Tools: Darning needle, Scissors, Plush stuffing, Pink eyeshadow or soft pastels for shading, (Optional) Stitch markers.
🔑 Abbreviations
| Abbreviation | Meaning |
| MR | Magic Ring |
| R | Round |
| CH | Chain |
| FO | Fasten Off |
| SLST | Slip Stitch |
| SC | Single Crochet |
| INC | SC Increase |
| DEC | SC Decrease (invisible ones recommended) |
| HDC | Half Double Crochet |
| BBL | Bobble Stitch (5 loops on the hook) |
| FLO | Front Loop Only |
| RN | Round Number “N” |
| (…) x N | Repeat what’s in the brackets N times |
| O | Repeat the sequence of “SC, INC” 6 times (used for Round 3 in the body) |
| {…} | Total stitch count for the round |
| {# x N} | # number of stitches for N rounds |
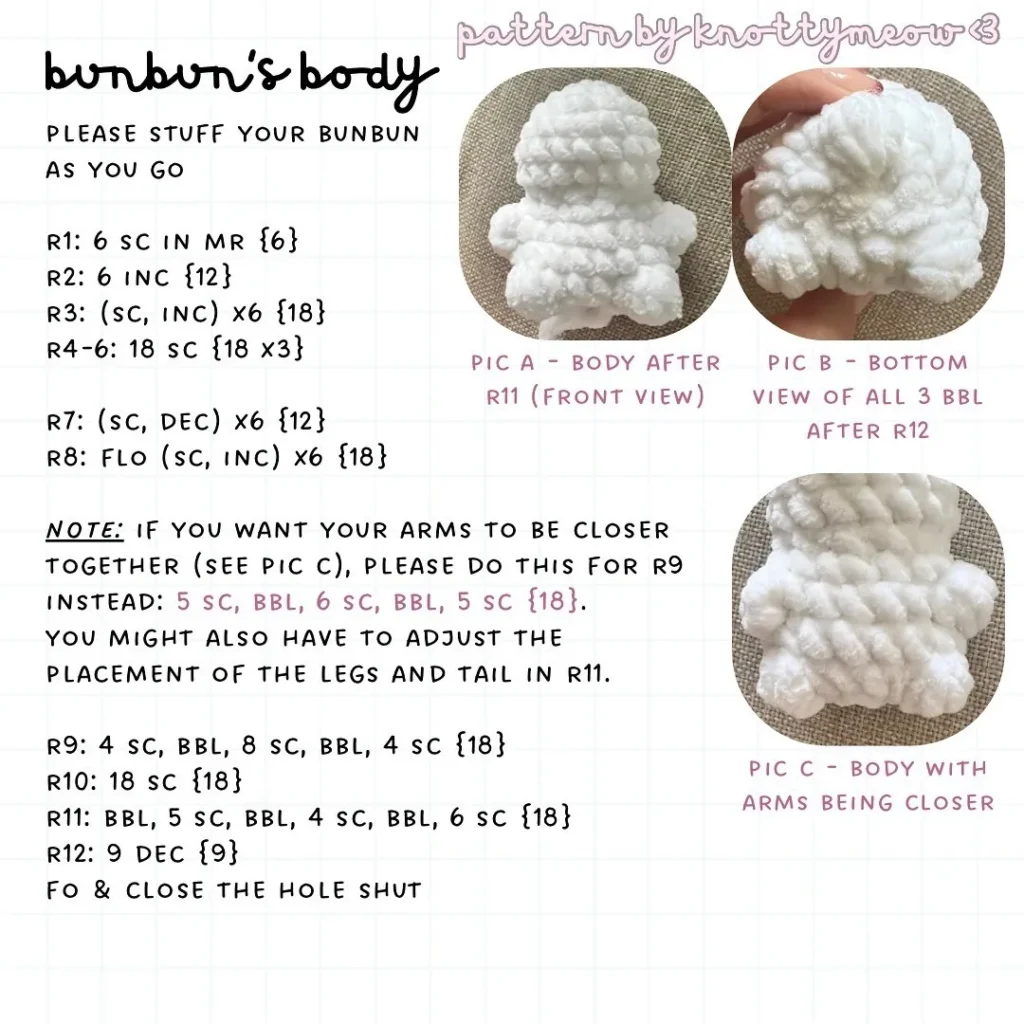
1. Bunbun’s Body
(Please stuff your bunbun as you go. The BBL stitches for R9 and R11 form the arms and legs.)
| Round | Pattern | Stitches (St) |
| R1 | 6 SC in MR | {6} |
| R2 | 6 INC | {12} |
| R3 | (SC, INC) x 6 | {18} |
| R4-6 | 18 SC x 3 | {18 x 3} |
| R7 | (SC, DEC) x 6 | {12} |
| R8 | FLO (SC, INC) x 6 | {18} |
| R9 (Arms) | 4 SC, BBL, 8 SC, BBL, 4 SC | {18} |
| (Alternative R9 for closer arms): 5 SC, BBL, 6 SC, BBL, 5 SC {18}. You might also have to adjust the placement of the legs and tail in R11. | ||
| R10 | 18 SC | {18} |
| R11 (Legs & Tail) | 5 SC, BBL, 4 SC, BBL, 6 SC | {18} |
| R12 | 9 DEC | {9} |
| FO & close the hole shut. |
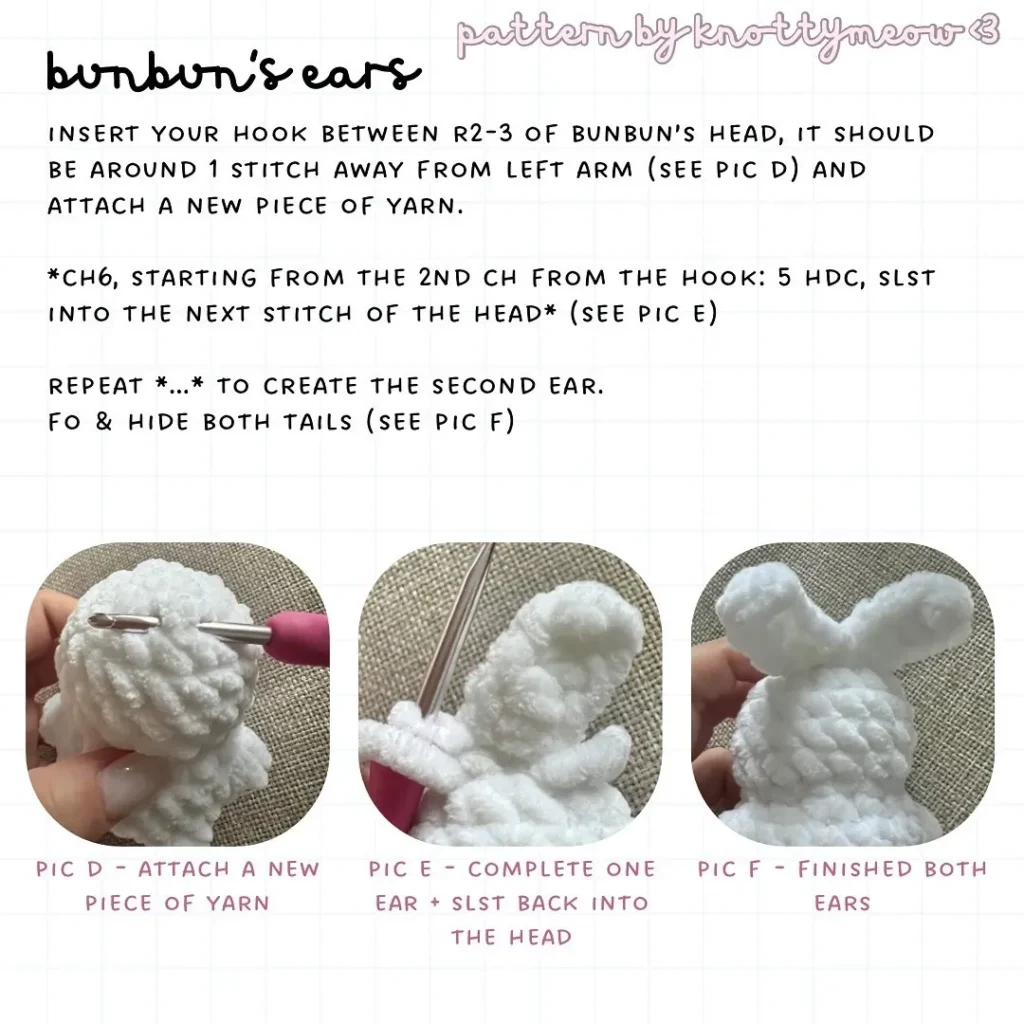
2. Bunbun’s Ears (Make 2)
- Insert your hook between R2-3 of the bunbun’s head, approximately 1 stitch away from the left arm (R9) and attach a new piece of yarn.
- *CH 6, starting from the 2nd CH from the hook: 5 HDC, SLST into the next stitch of the head*
- Repeat *…* to create the second ear.
- FO & hide both tails.
3. Embroidery & Shading
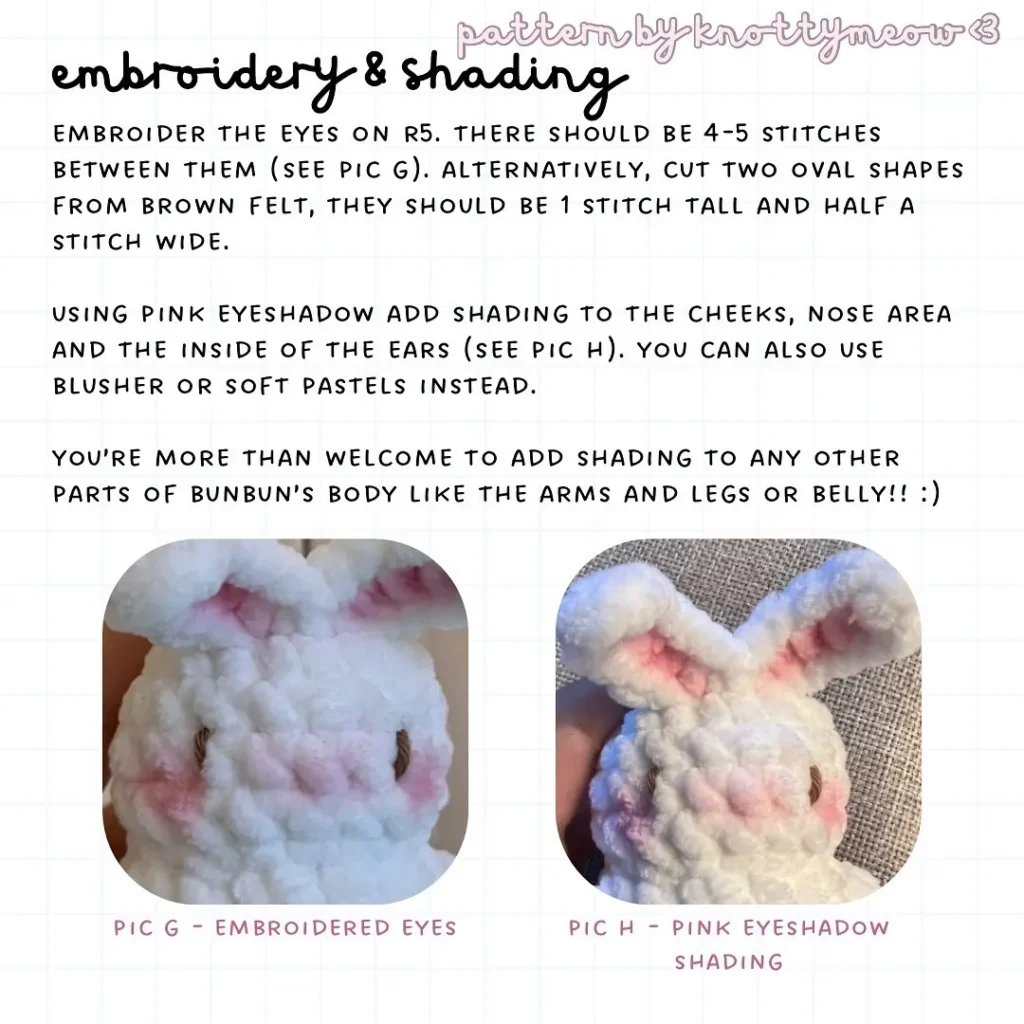
- Eyes: Embroider the eyes on R5. There should be 4-5 stitches between them.
- Alternatively, cut two oval shapes from brown felt (1 stitch tall and half a stitch wide) or use safety eyes.
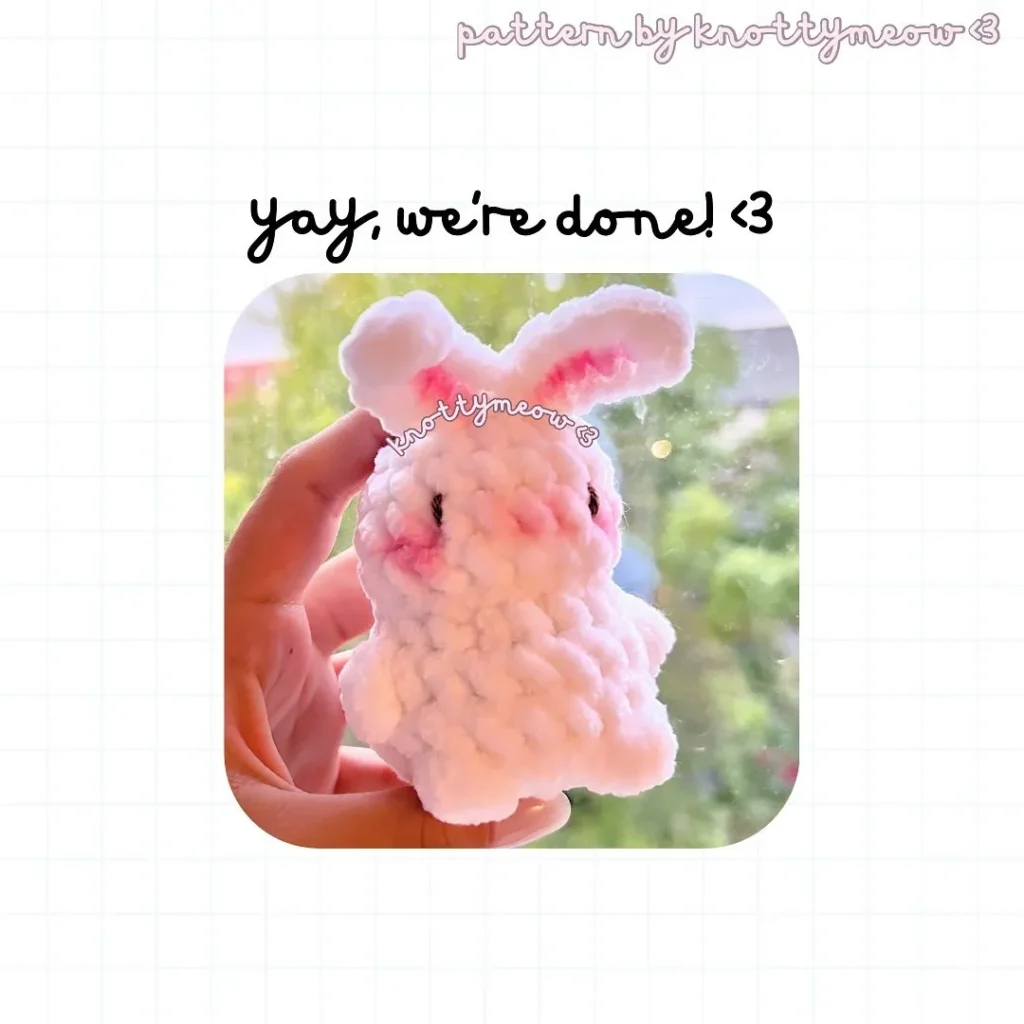
- Shading: Using pink eyeshadow, blusher, or soft pastels, add shading to the cheeks, nose area, and the inside of the ears. You can also add shading to other parts of the body.
Enjoy making the little bunbun!