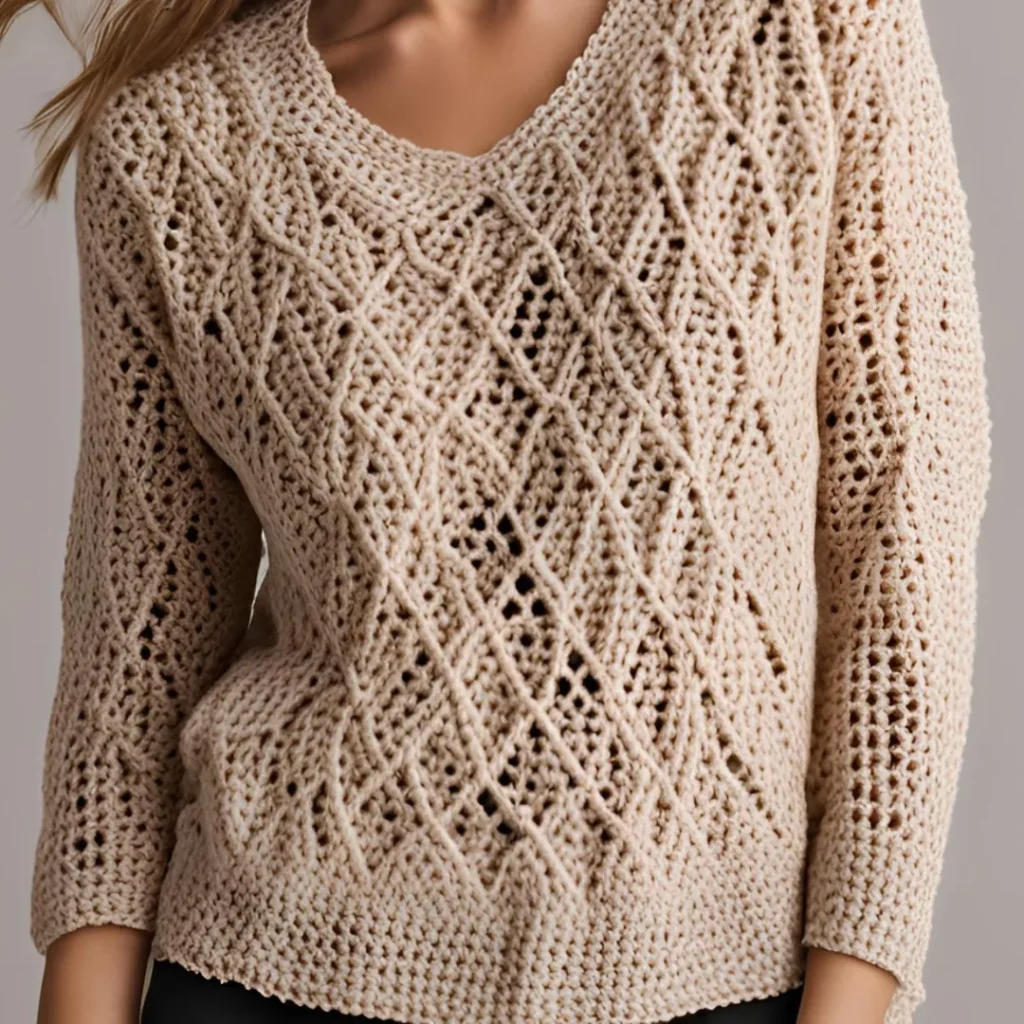
Lattice Lace Sweater Crochet Pattern
Materials:
- Yarn: Worsted weight yarn (approximately 1000-1500 yards depending on size)
- Hook: Size H/5.0 mm crochet hook (or size needed to obtain gauge)
- Tapestry Needle for weaving in ends
- Stitch Markers (optional)
- Scissors
Gauge:
- 4 inches = 16 stitches x 20 rows in double crochet (DC) stitch
Sizes:
- This pattern is written for a Medium size. Adjustments for Small (S), Large (L), Extra Large (XL), and XXL are provided in parentheses.
- Bust measurement: S (34″), M (38″), L (42″), XL (46″), XXL (50″)
Abbreviations:
- ch: chain
- st(s): stitch(es)
- sc: single crochet
- dc: double crochet
- tr: treble crochet
- sl st: slip stitch
- RS: right side
- WS: wrong side
- rep: repeat
Special Stitches:
- Crossed Treble Stitch (X-Tr): Skip 2 sts, tr in next st, ch 2, tr in the first skipped st (crossing over the tr just made).
Pattern Instructions
Back Panel
- Foundation Chain:
- Ch 99 (109, 119, 129, 139) or a multiple of 6 + 3 for your desired width.
- Row 1 (RS):
- Dc in the 4th ch from the hook and in each ch across. (96, 106, 116, 126, 136 sts)
- Turn.
- Row 2 (WS):
- Ch 1, sc across. Turn.
- Row 3:
- Ch 3 (counts as dc), skip 2 sts, X-Tr, repeat from * to * across, ending with dc in the last st. Turn.
- Row 4:
- Ch 1, sc across. Turn.
- Row 5:
- Ch 3, dc in each st across. Turn.
- Row 6:
- Ch 1, sc across. Turn.
- Repeat Rows 3-6 until the back panel reaches the desired length for your size:
- S: 22 inches
- M: 23 inches
- L: 24 inches
- XL: 25 inches
- XXL: 26 inches
- Finish:
- Fasten off and weave in ends.
Front Panel
- Follow the same steps as the back panel until you reach the point where the V-neck begins. For this pattern, the V-neck will start when the front panel measures:
- S: 12 inches
- M: 13 inches
- L: 14 inches
- XL: 15 inches
- XXL: 16 inches
- V-Neck Shaping:Right Side:
- Divide your work in half: For a Medium size, place a marker in the middle at st 48 (for other sizes, adjust accordingly).
- Work the X-Tr stitch pattern until you reach the marked center st.
- Decrease: Ch 3, turn, work the X-Tr stitch pattern, stopping 2 sts before the center. Dc2tog (decrease 1 st).
- Continue to work the X-Tr pattern, decreasing 1 st at the neckline edge every row until the neckline depth reaches:
- S: 9 inches
- M: 10 inches
- L: 11 inches
- XL: 12 inches
- XXL: 13 inches
- After reaching the desired neckline depth, continue working without further decreases until the front panel matches the back in length.
- Fasten off and weave in ends.
- Reattach yarn at the marked center st and work the opposite side, mirroring the decreases as done on the right side.
- Fasten off and weave in ends.
Sleeves
- Foundation Chain:
- Ch 42 (46, 50, 54, 58) or the number of stitches for your sleeve width.
- Rows 1-2:
- Work the same pattern as Rows 1-2 of the back panel.
- Rows 3-6:
- Work the same pattern as Rows 3-6 of the back panel.
- Shaping the Sleeve:
- Increase 1 st at each end of every 4th row until the sleeve is the desired length and width:
- S: 16 inches
- M: 18 inches
- L: 20 inches
- XL: 22 inches
- XXL: 24 inches
- Continue working the pattern until the sleeve measures the desired length for a 3/4 length sleeve:
- S: 17 inches
- M: 18 inches
- L: 19 inches
- XL: 20 inches
- XXL: 21 inches
- Finish:
- Fasten off and weave in ends.
- Increase 1 st at each end of every 4th row until the sleeve is the desired length and width:
Assembly
- Block all pieces to measurements using a blocking board or pins and steam.
- Sew the shoulder seams together using a tapestry needle and the mattress stitch for an invisible seam.
- Set in the sleeves: Pin the top center of the sleeve to the shoulder seam, then pin the sleeve in place along the armhole. Sew the sleeve into the armhole.
- Sew the side seams and the underarm seams using the mattress stitch.
- Neckline Finishing: With RS facing, attach yarn at one shoulder seam, work a row of sc around the neckline. Work evenly around, placing 2 sc in each corner of the V-neck. Join with sl st to the first sc. Fasten off and weave in ends.
Final Notes
- Customization: Feel free to adjust the sleeve length, overall length, or fit of the sweater as needed.
- Yarn Substitution: If you prefer a lighter or heavier yarn, adjust your hook size and gauge accordingly.
- Blocking: This step is essential to ensure your stitches open up, especially for lace patterns.
This detailed pattern should guide you through creating a beautiful lattice lace sweater